Showing posts with label condiment. Show all posts

Tuesday, September 13, 2011

Last Gasps of Summer: Hot Dog Party!

Hot Dog Party!

Adam's birthday is at the end of August. It falls right around Labor Day and Boston's unofficial everyone-switch-apartments day but we usually squeeze in a get together. This year instead of a cookout, we had a hurricane tropical storm. Irene wasn't really so bad in our neck of the woods, we just sat on the couch and played a lot of cribbage. It felt like something was missing, though, so on Labor Day we had a little cookout.

We decided that instead of burgers and chicken and blah blah blah we'd keep the grilling focused on my personal favorite grilled food: the hot dog. (Let's be honest, hot dogs are up there in my top 5 favorite foods in all the land.) So to keep things interesting I went a little crazy on the condiments. Instead of a proper recipe today, I present several suggestions for awesome hot dogs.

The German Dog: homemade sauerkraut, whole grain mustard
The Kimchi Dog: chopped kimchi, sriracha if you're feeling spicy
The Chicago Dog: yellow mustard, sliced tomato, celery salt, kosher dill pickle spear, pickled banana peppers, chopped raw onion
The Nacho Dog: salsa (red or green, your choice), pickled jalapenos, monterey jack cheese, sour cream. If your husband happened to make corn tortillas for breakfast that morning, use one of those instead of a bun.
The Everything Dog: All of the above. Yeah, that happened.
The Classic: Yellow Mustard. Maybe relish.
The NIMBY: Ketchup. I didn't even put it out.


So, what do you put on your hot dog? 


Wednesday, September 1, 2010

Chili Garlic Hot Sauce

Hot Sauce

We go through hot sauce in this house like nobody's business. Adam is a spice fiend, and it's rubbed off on me to the point that I now have preferences from dish to dish. I'll eat a fried egg with a healthy dose of Frank's, a burrito with a splash of Tabasco, or a side of Adam's breakfast potatoes with a sprinkle of Cholula. Speaking of which, somebody remind me to tell you about Adam's breakfast potatoes at some point, because they are gooood.

233/365: Scotch Bonnet

A couple of Saturdays ago while Adam made potatoes to go with our eggs, I browsed my google reader and came across Melissa Clark's Good Appetite column on homemade hot sauces. I loved the idea of a chili garlic sauce sweetened with sweet peppers instead of sugar, and we had a heap of sweet red peppers coming ripe in the garden. Plus, habaneros are crazy cheap, like a quarter a piece, so this huge jar of sriracha-like sauce cost us a buck plus pantry ingredients. And hey, it was fun!

Carmen

Chili Garlic Hot Sauce
adapted from Melissa Clark in the New York Times


I know everyone is always saying you should wear plastic gloves when chopping hot peppers. For milder chiles like jalapenos, I don't usually do so (oooh, living on the edge!). In fact, I don't even have plastic gloves. But when chopping four habaneros, I thought it was good advice, and I improvised by sticking sandwich baggies on my hands before I got started. A little goofy looking, but it worked. Oh, and try not to breath in chili-vinegar fumes, that stuff will sting your sinuses like no other.

4 hot chili peppers, preferably habanero
3/4 pound sweet red peppers (2-3 red bell peppers or similar)
3 huge or five regular garlic cloves
3/4 cup white vinegar
1/2 teaspoon kosher salt


Roughly chop the chilis (wear gloves or baggies, please!), sweet peppers and garlic. Combine in a medium pot with the vinegar and salt, and bring to a simmer over medium heat. Simmer for about 10 minutes or until peppers are tender. Transfer carefully to a blender, or use an immersion blender, and blend the sauce until you have a mostly smooth puree. Pour into a jar (I got a little more than a pint) and stick it in the fridge. 


The original recipe says to wait three days before eating, but we ate some the night I made it and loved it.


Makes about 2 cups (one pint, though I got a tiny bit more than that), and should keep in the fridge for at least a month.

Chile Garlic Sauce

Plus, look how awesome my timing is: September first is sweet and hot peppers day and the first week of Fall Fest 2010! Did you play this week?

Sunday, November 1, 2009

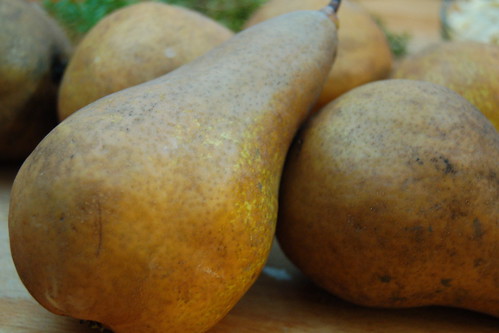
Pear, Port & Thyme Conserve


I've made this Pear, Port and Thyme conserve twice now, but I still can't get over the name. Not of this one, specifically, but of conserve. Don't you just want to Frohnchify it? No not French, FRONCH. It's different. CooohnSEEEERVh. COHNseehve. Coh-hon-hon-hooon sehhhh heh heh hehVE.  I can't figure out where the emphasis goes.


What I have figured out is where this sweet and aromatic condiment goes: IN MY BELLY. Like I said, I've made it twice. The first time I got five half-pint jars out of it, but the second time I only got four... partly because I used slightly fewer pears and partly because I ate so much while it was cooking.

This recipe is from Eugenia Bone's book Well Preserved, though I've made a couple of changes. I'll be bringing it with me to a Canvolution event in Boston, the focus of which is a preserve swap (!) in a few weeks. If you don't want to can the conserve, you could cut the recipe in half to a more usable amount and store it in the fridge. According to the recipes that follow in the book, this stuff is good with squash and veal and in gingerbread, but I also gave a jar to a friend who used it as a sauce with a pork tenderloin and said it was a big hit, and I suspect it would go well with cheese and crackers. However you use it, if you figure out how to pronounce it, will you please let me know?


Pear, Port & Thyme Conserve
adapted from Well Preserved


So it turns out a conserve is defined by the presence of raisins and nuts. This one calls for slivered almonds and golden raisins, but if you only have the regular purple kind I don't think it will make much difference flavor-wise. It may affect the color.

Makes 4-5 half pint jars

1/2 cup golden raisins
1/2 cup light brown sugar
1/2 cup fresh squeezed orange juice (see note, below)
1/4 cup bottled lemon juice (see note, below)
1 tablespoon grated lemon zest
1/2 teaspoon cinnamon
1/2 teaspoon nutmeg
1/2 teaspoon ground ginger (the spice powder, not the root)
pinch of salt (I used 1/4 teaspoon)
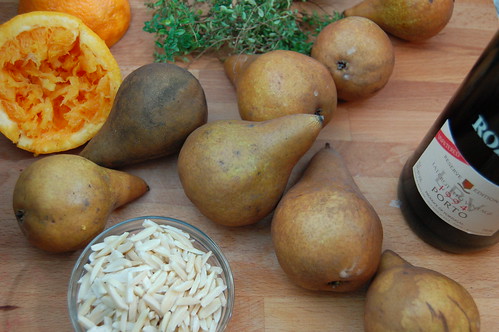
3 pounds Bosc or Anjou pears, peeled, cored and coarsely chopped (they don't break down much so don't leave any huge chunks)
1/2 cup sliced blanched almonds
1/4 cup port wine
1 tablespoon chopped fresh thyme (lemon thyme is very nice here)

Note: Total amount of juice is 3/4 cup. When I juiced one orange and only got between 1/3 and half a cup of juice, not the full 1/2 cup called for, I just poured bottled lemon juice in until I hit the 3/4 cup mark. I like acidity though, and I didn't have a backup orange.

If you're planning to hot-water-bath can these*, bring a large pot of water to a boil with a rack on the bottom of the pot. I usually put my empty jars (without the lids) in the rack while the water comes up to temperature, that way they've been sterilized by the time the preserve is cooked and ready to be canned. Heat the lids in a small pot of simmering (not boiling) water to soften the flange.

Combine the raisins, brown sugar, orange and lemon juices, lemon zest, cinnamon, nutmeg, ginger and salt in a large pot over medium high -heat. Stir to dissolve the sugar while the mixture comes up to a boil. Add the pears, lower the heat, and cover the pot. Let it simmer on low for 15 minutes. Remove the cover so it starts to thicken up, and cook another 15 minutes, stirring occasionally.

Add the almonds, port and thyme, and stir to combine. Once heated through, fill the jars, leaving 1/2 inch of head space, clean the rims then apply the simmered lids, and the rings to finger-tight. Put the filled jars on the rack in the pot (make sure they're covered by 2-3 inches of water) and process for 20 minutes (start counting once the water comes up to a boil). After 20 minutes, shut off the heat, but leave the jars in the water for five more minutes. Remove to the counter and let cool undisturbed for 6 hours.

*Precise, exlicit instructions for water bath preserving are available from Canning Across America or the National Center for Home Food Preservation. The Ball Blue Book of Preserving is also a great basic resource for methods and recipes.

Monday, September 8, 2008

Pickles!

A few weeks ago at T^2's housewarming party, I had homemade pickles for the second time in my food-conscious life. I could have said adult life, but I think that would have been a lie. My aunt (Hi, Auntie Patrice!) makes her own pickles too which I had a couple of summers ago - my first time - and I'll bet my mom made them at some point (Mom? Have you made pickles?).


But since I only started getting 'into food' in the last couple of years, it wasn't until I had Tammi's pickles that I wanted to try making my own. Since then I've come across approximately 497 pickle methods and home-pickling stories on various blogs made from a plethora of fruits and vegetables. I wanted to start with a classic cucumber dill pickle, and I knew I would want them to be sandwich appropriate (Tammi's were delicious on burgers) so I sliced them into rounds instead of spears.


I poured in a pretty standard brine: 1/2 cup rice vinegar, 1/2 cup water, 1 1/2 tablespoons of salt. I added two garlic cloves and a bit of dill. I stuck it in the fridge.

The next day I gave the pickles a try. WHOA. SO vinegary. And maybe even too salty. And frankly, they did not improve with age, even though I poured out some of the brine and added more water. Next time I will go skew the ratio in the favor of water if I want to eat them out of hand. All is not lost, however! The extra tart pickles are DEEElicious on Hugh's turkey burgers with marmalade mustard glaze, Swiss cheese, lettuce and tomato.

My Too Acidic But Delicious on Burgers Pickles
Inspired by Tammi, who I think was inspired by Tom's Grandma

1 glass jar
1 large cucumber
1/2 c rice vinegar
1/2 - 1 c water
1 1/2 Tbsp salt
a few sprigs dill
2 cloves garlic

Clean the jar. Slice the cucumber into rounds between 1/8 and 1/4 inch thick. Slice the garlic cloves into a couple of pieces. Put the cucumbers, garlic and dill in the jar - you will probably have extra cucumber slices. In a large measuring cup or bowl combine the vinegar, water and salt, and stir to dissolve. Pour the brine over the contents of the jar. If there is still space fill it with water. Stick the jar in the fridge. Pickles are ready the next day but will keep for weeks in the fridge.