Showing posts with label dessert. Show all posts

Monday, November 23, 2015

Sweet Potato Pie, y'all!

Untitled

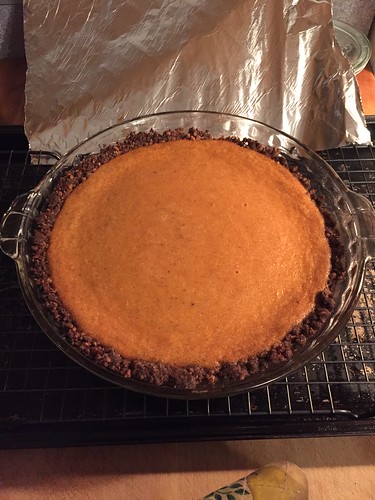
Guys, guys, guys, guys! I made this pie. (Pictured before whipped cream). YOU SHOULD MAKE THIS PIE. Pecan CRUST. Pecans in the crust! The whole thing is just killer. Plus you're probably already roasting sweet potatoes at some point this week, just throw another one in there. You can use buckwheat flour in the crust and make it gluten-free, too. DO IT.

Wednesday, November 28, 2012

Golden Fruitcake

Fruitcake

You have been led to believe that fruitcake is icky. You have been told that it is heavy and leaden and will sit like an anvil in your stomach. You have been told that only German grandmothers like fruitcake, and that they make too much of it and that you'd better run and hide when the mailman limps up to your door hauling a ten pound, loaf-shaped package from Oma. People, you have been misled.

As it turns out, fruitcake can be delightful. This particular fruitcake is actually pretty light, considering it's 50% dried fruit soaked in brandy. My mom (hi mom!) got a bee in her bonnet about fruitcake a couple of weeks before Thanksgiving, so after the big day we hauled out the mixer and made a double batch of this recipe from King Arthur Flour. And lo, it was delicious. Plus it glows like a stained glass window:

295: See Through Cherry!

Golden Fruitcake
adapted from King Arthur Flour

Mom had a longish list of people who should receive a fruitcake, so we made a double batch and I measured by weight (regular sized batch appears below). I have a Pro series KA mixer with a 6 quart bowl and the double batch filled it to the brim, so heads up. Also, a double batch filled 12 mini loaf pans (5"x2"), plus 2 small loaf pans (7"x2.5") and 1 regular loaf pan (8.5"x4.5"). I assume a regular sized batch will fill, uh, half that? The point is, it's a large recipe already. Mini loaves are easier for giving to other people, though, I think. Incidentally, this recipe uses a really interesting extract called Fiori di Sicilia which to me smells like excellent panettone.

We also bought mixed dried fruit from KAF; in addition to the fruits below it includes pineapple and date, so if you want to chop your own, feel free to include those as well.Feel free to mix and match fruit to your heart's delight, but please don't skip the candied cherries. They are the prettiest.

Fruit:
5 cups mixed dried fruit of your preference (20-25 ounces), OR:
  2 cups golden raisins (10ish ounces)
  1 cup dried cranberries (4ish ounces)
  1 cup dried apricots, diced small (4ish ounces)
  1 cup chopped candied citrus peel (4ish ounces)
1 1/2 cups candied cherries (10ish ounces)
1/2 cup brandy (or rum or yes I suppose you could use apple juice, but why?)
1 tsp vanilla extract

Combine the fruit (except the cherries), booze and extract in a bowl. Stir to combine and let sit overnight.

Cake:
1 cup unsalted butter (2 sticks or 8 ounces)
1 3/4 cups sugar (12.25 ounces)
1/4 cup light corn syrup (2.75 ounces)
2 teaspoons baking powder
1 teaspoon salt
1/2 teaspoon ground nutmet
1/8 teaspoon Fiori di Sicilia if you have it
5 large eggs
3 3/4 cups all purpose flour (13 3/4 ounces)
1 cup whole milk
2 cups chopped pecans 
More brandy (or the liquor of your choice) for brushing

Preheat the oven to 300. Spray your chosen loaf pans with non-stick spray. You may wish to have a few extra loaf pans around, I was surprised at just how many we got out of the batch.

Combine the flour, baking powder, salt, and nutmeg in a bowl. In the bowl of a stand mixer fitted with a paddle attachment, cream the butter, sugar and corn syrup. Add the eggs one at a time, mixing well after each addition. Add the flour in three additions alternately with the milk, starting and ending with the flour. When the last flour addition is mostly incorporated but you can still see some white spots, add the booze-soaked fruit, then the cherries and the nuts, allowing the mixer to do its thing and not adding everything all at once lest it spill all over the dang counter.

Fill the sprayed loaf pans 3/4 full. I suggest you put them all on a sheet pan for ease of transfer from counter to oven. Bake for as long as it takes for them to get golden, and for a tester inserted in the center to come out clean. Small ones will take about an hour, mediums ten minutes more and large loaves probably in the 90 minute range. Don't be afraid to put them back in for a few minutes if they're not golden all over. Fruitcake is a slow, old fashioned confection that can't be rushed.

Once they're out of the oven, let them cool for 15 minutes or so, brush them with more brandy, then pop them out of the pans and let them cool to room temp. Feel free to brush them more than once (I did!). Allow to cool completely, then wrap tightly in plastic. We popped ours back into the mini paper pans we baked them in so they'd be cuter for gifting. Fruitcake will keep for a month as long as you brush it with more brandy once a week or so.

Slice thinly when serving, preferably alongside a cup of coffee or tea or maybe a hot toddy. Be filled with holiday cheer.

Tuesday, November 27, 2012

Tuesday, November 20, 2012

Pie tip!

I learned an excellent pie trick from a pastry instructor at work today. Bake your pie on the bottom shelf! Then your bottom crust will cook as fast as the top since it's closer to the heating element and it won't be soggy. WORD. I am employing this trick at this very moment, in fact. My house smells like blueberry heaven.

Incidentally, regarding blueberry pie: I use Elise's filling and Ruhlman's 3:2:1 pie dough for the crust. This time around I'm trying pastry flour because I thought it might make a more tender crust. Will report back.

Friday, July 8, 2011

Dairy Magic and a Three Ingredient Dessert

heaven in three ingredients

You guys have heard how easy it is to make creme fraiche, right? Fill a pint jar most of the way up with heavy cream then add a couple tablespoons of buttermilk.* Now, wait 12-18 hours. Ignore the heebie jeebies about leaving dairy out at room temperature, it's fine, you're just letting the cultures in the buttermilk do their fine work on the heavy cream. When you're done waiting, take the lid off the jar and voila! Creme fraiche! Your homemade creme fraiche will keep in the fridge for a week or two.

Now that you have magically transformed one dairy product into another, allow me to suggest that you spoon some into a bowl, cover it with berries, put a little more on top and add a sprinkle of brown sugar.

Now go forth! Make magic! and eat dessert.

*Use whatever container you want, just use about 2 cups of cream and 2-4 tablespoons of buttermilk.

Tuesday, September 7, 2010

Peach Crumb Cake

Layers

Peaches, you are delicious. The only problem I have with you, peaches, is that people always want to talk about you the same way: as the summer fruit, eaten standing over the sink, juice dripping down arms, sticky faces. Which of course, peaches, is the best way to eat the first of you, early in August at the beginning of your harvest. But what about later?

Peach Crumb Cake

What about in early September, when my sticky-face, juicy-arm peach gorge is starting to feel a bit cliché? Well, peaches, that's when I start to think about how delicious you can be when cooked. Sometimes I grill you and plop a bit of ice cream down at your side. Simmered down into jam or tucked into a cake, your sweet tartness deepens and cools, rather like the turning season, and I realize yet again that you can be a fall fruit, too.  

230/365: Cake for breakfast

Peach Crumb Cake
Makes nine 2 1/2 inch square pieces
From Gourmet, August 1993


I found the crumb topping on this cake to be very thick. If you wanted to, you could cut it down to 3/4 the amounts listed and I bet you'd still get the same effect. This cake kept, covered, for a few days at room temperature, though the crumb topping is the crunchiest on the first day. I also know from experience that it is excellent for breakfast, so just take that into consideration when planning your next brunch, mmkay? 

First, make the topping:

1 cup AP flour
1/2 cup (packed) brown sugar
6 tablespoons unsalted butter (3/4 stick)
3/4 teaspoon cinnamon

Combine all ingredients and mash with a fork until well combined and crumbly. Set aside.

Then, make the cake:

1 stick softened unsalted butter
2/3 cup sugar
2 eggs
1 cup AP flour plus a couple of tablespoons for flouring the pan
3/4 teaspoon double acting baking powder
1/2 teaspoon salt
3-4 large peaches (about a pound and a half) peeled, pitted, and thinly sliced.

Preheat the oven to 350F. Butter an 8x8 inch cake pan, then add a couple tablespoons of flour and shake and tap it all around so the pan has a layer of flour clinging to the butter.

In a mixer or by hand, cream together the butter and sugar until light and fluffy, then add the eggs one at a time, beating well after each egg. Sift (or whisk) together the flour, baking powder and salt, and add them to the wet ingredients, beat just until combined. Spread the batter evenly in the pan.

Layer the sliced peaches evenly across the surface of the batter, then top with the crumb topping. Bake for 30 minutes, then turn the cake 180 degrees for even baking and bake another 20-30 minutes or until a tester comes out clean. Serve warm or at room temperature.

Tuesday, August 31, 2010

Sage Ice Cream

Sage Ice Cream, Grilled Peaches

People, it is hot. I know it's not considered good form to mention the weather in every blog post ever, but if the weather doesn't dictate what I want to eat, then I don't know what does. Maybe if I call it "micro-seasonal eating" or something?

Anyway, last week we had a couple days of rain which was oddly delightful after the very warm, blue skies, humid breeze end of July. The garden loved the water: the monster zucchini is climbing out of the pot, our cherry tomatoes have put forth a second round crop, the lemon verbena is up to my waist, and the rest of the herbs are very, very happy.

232/365: Sage

Back in June, still giddy from the first real month of garden fresh herbs, Adam asked me how I planned to use the bounty we had planted. Well, obviously basil gets whizzed into pesto, and Kalyn taught me to freeze thyme and rosemary. I used the lemon verbena in blueberry jam that we'll eat all year, and the bay can winter over on the enclosed front porch, but what about the sage? It freezes ok, and I'll probably freeze whatever's left toward the end of the season, but I had a hunch that sage would make a really interesting ice cream. When I searched for a recipe, the one that kept popping up was this one from a 2001 issue of Gourmet (moment of silence). However. Nine egg yolks? Psssh. Clearly not necessary. And I don't want to overload my ice cream maker, I know it can handle about 3 cups of liquid in the base, but not much more. So I tweaked and I fiddled and I came up with the recipe below. It went great with rhubarb pie (sans strawberry) back in June, and it was an excellent dessert accompaniment to the peaches we threw on the still-hot grill after we ate kabobs for dinner.

Peaches and Sage Ice Cream

Sage Ice Cream
adapted from Gourmet, October 2001
Makes about a quart

You can use just about any combination of dairy you like, as long as you get three cups total. The first time I made this I used two cups of heavy cream and a cup of whole milk. This time I used one and a half cups of each. You could get away with two cups of cream and a cup of 1% or 2% if you want, but don't wuss out and use skim milk, ok? Or if you do, don't blame me when your dessert is icy and wan. Fat is flavor, friends.

2 cups heavy cream
1 cup whole milk
1/3 - 1/2 cup fresh sage leaves, roughly chopped
3 strips lemon zest, 2 inches long
6 egg yolks
scant 3/4 cup sugar
1/4 teaspoon salt

Heat the cream, milk, sage and zest in a medium sauce pot just until it boils. Turn off the heat and allow to steep for half an hour.

Whisk together the egg yolks, sugar and salt. Temper the eggs: slowly add a cup of the hot cream mixture to the eggs so they warm slowly and do not curdle, then add the egg mixture back to the pot of cream, whisking constantly. Cook over low heat, stirring constantly, until it coats the back of a spoon. (By which I mean, if you run your finger over the back of the spoon, the trail it creates stays put and is not immediately overrun with cream again).

Strain the custard through a sieve into a bowl, then press a layer of plastic wrap right onto the surface and chill for at least three hours or overnight. Churn in an ice cream machine, then freeze in an airtight container until ready to use.

Thursday, March 11, 2010

Chocolate Orange Brownies


Do you remember Terry's Chocolate Orange? This UK import is most popular in the states around the holidays, when I think it's supposed to evoke some prehistoric memory of when an orange in your stocking was a highly coveted prize from the man in red. In case you've never seen one, it's a spherical milk chocolate confection flavored with orange oil and separated into segments in the style of an actual orange. To eat one, you follow the directions on the label: whack and unwrap! Give the butt of the faux-range a solid thwack on the table, then peel off the foil. If you've hit it right, the segments will fall away from each other in 20 identical pieces for you to share with 19 friends or to savor over the course of 20 days or, let's be serious, to eat all at once in front of an Ab Fab marathon.


The one and only time I had a Chocolate Orange of my own was at least 10 years ago. I don't remember where it came from, but I do remember sitting in my high school drama coach's classrom and giving the orange a timid tap on the desk in front of me. Someone told me I had to hit it harder, and when I did, the whole thing shattered instead of separating neatly. It was so traumatizing I never had another one.

Ok, not really. I mean, it was not traumatizing, but I haven't eaten a Chocolate Orange since high school - that part's no joke. Given that it's been so long since I've eaten one, I'm not sure why this recipe in the letters section at the beginning of this month's Bon Appetit caught my eye the way it did, but boy am I glad it did. These brownies are cakey, not fudgey which is my usual preference, but they pack a real whallop of orange flavor, and it sets off the bitterness of the natural unsweetened cocoa powder quite nicely. The chopped toasted pecans add an interesting texture, but if you're nut sensitive or just out of pecans, chocolate chips would make a nice substitute, or you could just skip the textural bits all together.
 
Chocolate Orange Brownies
adapted from Bon Appetit, March 2010, which was adapted fromthe Homepage Cafe in Bozeman, MT
makes 16 cake-like brownies

Nonstick spray
1/2 cup hot water (almost boiling)
6 Tbsp natural unsweetened cocoa powder
1 1/4 cups dark brown sugar
3/4 cup all purpose flour
1/2 tsp baking soda
1/2 tsp baking powder
1/4 tsp salt
1 cup pecans, toasted and chopped
2 large eggs
10 Tbsp butter (1 1/4 sticks) melted and cooled
1/2 tsp vanilla extract
zest of one orange

Preheat the oven to 350˚. Melt the butter so it has time to cool off while you  prepare the rest of the ingredients.

Spray an 8x8 or 9x9 square metal baking pan with 2 inch sides with nonstick spray. (I used 8x8 and I had to adjust the baking time up by a few minutes; the recipe is written for a 9x9 pan but I don't have one of those.)

Whisk the 1/2 cup hot water with the cocoa powder in a small bowl (I used the same mug I microwaved the water in). In a medium bowl, whisk together the flour, brown sugar, baking bowder, baking soda and salt until they are well combined. Stir in the pecans. Whisk the eggs in a large bowl, then add the butter, orange zest and vanilla and whisk to combine. Whisk in the cocoa mixture. (While you're adding the warm things - the butter and cocoa mixture - make sure you add them slowly while whisking, so the heat doesn't scramble the eggs.) Add flour mixture, switch to a spatula or spoon and stir just until the flour disappears - don't overmix it.

Pour the batter into the oiled pan, and bake in the center of the oven, turning once for even baking, for 30 minutes. If using an 8x8 pan they may require another 2 minutes or so. A toothpick or small knife inserted in the center should have a couple of small crumbs attached. Cool the brownies completely in the pan on a cooling rack, then cut into 16 squares and enjoy.

Sunday, October 18, 2009

Apple Spice Cake


It's not unusual for October to be rainy here in Boston, and the forecast called for it, so when I left the house in the morning, I was wearing rain boots, a rain coat, and carrying an umbrella... but then I noticed the drops weren't drops. They were FLAKES. And then today it snowed again, but this time the flakes were the big downy chunks of snow that make me think of instant mashed potatoes. Nature is so cruel!

The only solace I am taking in the fact that we're getting SNOW in OCTOBER is that I have an excuse to bake cake. Well, the snow, and the seven apples, leftover from a picking trip weeks ago, taunting me from the fruit bowl. And the buttermilk going bad in the fridge.* Ok, three excuses to bake.


Apple Spice Cake
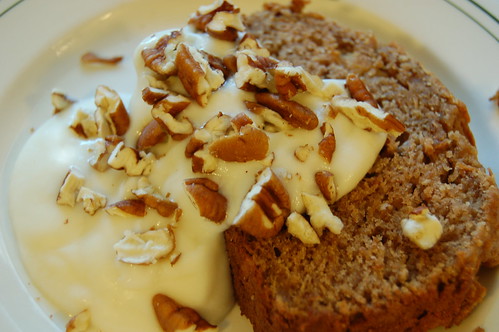
I adapted this from a recipe on The Perfect Pantry, based on the spices I like with apples and what I had in the house. It is excellent with ice cream for dessert, but I find it most suited for breakfast, toasted, with a dollop of yogurt and a sprinkling of pecans. I doubled this because I had so many apples and so much buttermilk to use; I brought the extra loaf to work and it was gone in minutes!

2 cups all-purpose unbleached flour
1/4 cup whole wheat flour
1 tsp baking soda
1 tsp salt
1/2 tsp nutmeg
1 tsp cinnamon
1/4 tsp ginger
1/2 cup vegetable shortening
3/4 cup brown sugar
2 eggs
1 tsp pure vanilla extract
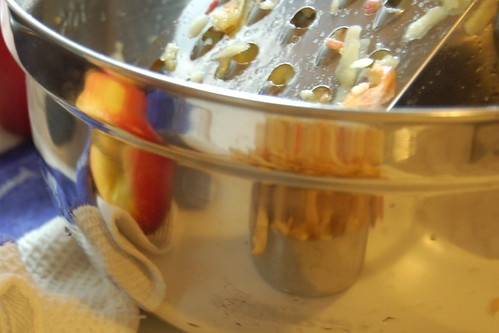
1 1/4 cup tart apples, grated (3-4 large apples- I used a mix of Gala, Braeburn, and Macoun, but you can use whatever you have.)
1/2 cup buttermilk

Preheat oven to 350. Lightly grease a loaf pan with butter or baking spray.

Combine flours and spices in a medium bowl, whisk to combine (I like to whisk in the bowl rather than sift, but I guess that might be cheating, so if you want, you can sift them together instead).

In another bowl, cream the shortening and brown sugar until fluffy. Add the vanilla and eggs to the sugar and shortening, and stir to combine well.

Add 1/3 the flour dry ingredients to the sugar mixture, stir to combine. Then add 1/2 the buttermilk and half the apples, stir to combine. Then add another third of the dry ingredients, then the rest of the buttermilk and apples, then the dry ingredients, stirring to combine after each addition.

Scoop the batter into the greased loaf pan, smooth the top a little, and bake for an hour, rotating once. Let the loaf cool in the pan for 10 minutes, then turn it out onto a wire rack to cool completely.

*Do you always have leftover buttermilk from pancakes or ranch dressing (or apple spice cake)? Sarah at the Pink of Perfection has created THE ULTIMATE BUTTERMILK RECIPE REPOSITORY and I am so excited about it that I have to use capital letters. Go check it out.

Saturday, October 3, 2009

Sour Cherry Liqueur

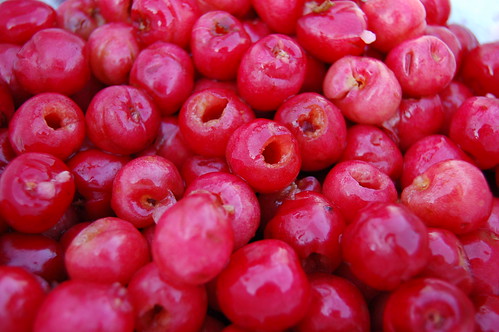
So you start with a bunch of cherries from Keown Orchards, in Sutton. This is back in, say, June. Pit most of them.

You end up with a big pile of mostly pitted cherries. Tuck them away in a big jar or crock, add some sugar and a whoooole lotta vodka. Wrap it in a towel to protect it from light, and wait two months.
Ta-da! Summer, distilled. Delicious on ice cream, not quite as delicious to photograph when you're running out the door on the way to another wedding! I'll be back next week my friends.

Sour cherry liqueur, not-so-loosely adapted from Not Derby Pie.

Friday, July 10, 2009

Currant Cakes (plus a winner and MORE books!)


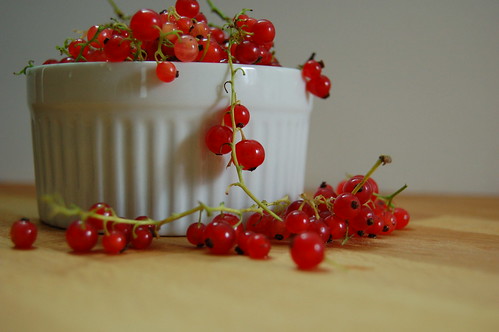
I went up to the market at Government Center on Wednesday around noon, looking for sour cherries. I had plans to start a liqueur. I found myself at the booth for Silverbrook Farms from Dartmouth, where I was drawn in by some lovely (purple!) spring onions. The farmer had some raspberries, but no cherries, so as I handed over my cash for the onions, I asked if he knew whether anyone at the market with cherries. He pointed me in the direction of the Keown Orchard booth (they did have cherries!), but then he asked if I would like to try the currants. I put a tiny red berry in my mouth and it exploded in a burst of tart, vaguely citrusy pink juice that actually made me say aloud "Whoa!" After a discussion of what they could be used for (muddled into drinks, reduced into syrup or jam, baked goods). I handed the man $3 and went on my merry way with a small carton of currants.

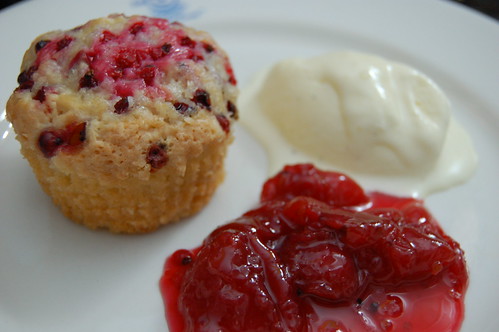
After a brief poll of the twitterverse, I decided on a batch of cakes. Well, cupcakes. Muffins? We ate them for dessert last night but then again for breakfast this morning, so I don't know what to call them. Anyway, I adapted this from Bea's recipe on La Tartine Gourmande, and next time I will almost certainly mix a few berries into the batter instead of just putting them on top, because they were such a nice foil to the sweetness of the cake that I wanted more! more! more!

And about that book giveaway! The random number generator has selected from 17 eligible comment the winner: number 7! Congratulations actionmoviegirl! Shoot me an email with your address (adriennebruno AT gmail DOT com) and I'll get your books in the mail. But wait, there's more!
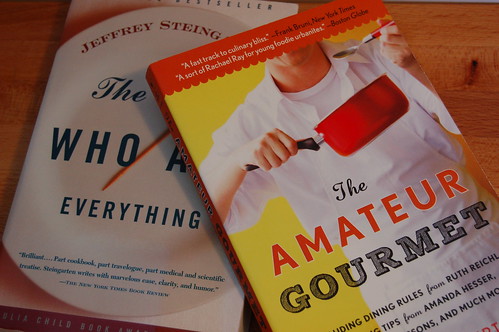
Because I like you guys, and because I have a bookshelf that STILL needs clearing, here are two more books you can win. This time the theme is gourmets. One, the Amateur Gourmet Adam Roberts and the other, a professional gourmet - food critic and frequent Iron Chef America judge Jeffrey Steingarten. Leave a comment on this post by midnight (Boston time) on Tuesday, July 14th and I'll select a winner on Wednesday. To get you started: what weird food item have you bought with no plans on how to use it? And what did you end up doing with it? Now, about those cakes....

Red Currant Cakes
I used a small muffin tin with six regular sized cups in it, but if you only have a full sized muffin pan, fill the empty cups with water so they don't scorch in the oven.

1/2 cup cake flour
1/2 cup almond meal (pulverize some blanched almonds in a food processor if you don't have this on hand)
scant cup of sugar
1/4 tsp baking powder
1/4 tsp salt
two eggs
large handful red currants
2 Tbsp butter, melted and cooled slightly

Preheat your oven to 350. Generously butter six muffin cups or line them with paper cupcake liners

In a medium bowl, combine the cake flour, almond flour, sugar, baking powder and salt. Whisk to combine. (I use a whisk because I'm a cheater and I hate sifting.) Beat the two eggs in a small bowl, then add them to the dry ingredients and stir gently with a wooden spoon. Before the eggs are completely combined, add the melted butter and stir just until it all comes together. If you're adding any currants to the batter, do so when you add the butter, but save some for the tops of the cakes.

Distribute the batter among six muffin cups, and gently press a tablespoon or more of currants on top of the batter. I started baking these for 25 minutes but I lost count of how many times I added five more minutes to the timer because they were still jiggly. I would start checking them at half an hour, but the may take as long as 45 minutes. Bake until the tops are risen and a thin knife inserted in the center just has a crumb or two clinging to it. Serve with ice cream for dessert or jam for breakfast.

Sunday, May 10, 2009

Brown Butter Raspberry Tart

Do you have a dessert good enough for strangers in your repertoire? Um, now you do. Holy crap, dudes. That was my reaction after bite one: when is the next time I'm going to be cooking for people, because I want to make THIS for dessert.

Start with a pretty straightforward crust of butter, flour and sugar. I had to add a little extra butter and flour to stretch the recipe - my tart pan is 10 inches, not the 9 inch called for by the recipe.

Stand up the raspberries shoulder to shoulder.

Twelve ounces of berries filled my tart pan fine, but next time I may go with a mix of raspberries and black berries.

Whisk together a couple of eggs and some sugar, and brown a stick of butter. Browning the butter separates the milk solids from the fat, and then the solids hang out on the bottom of the pan getting all toasty and nutty brown. Whisk the whole thing together, then pour it evenly over the berries until they juuust peek out the top.

This is hard part #1: do your best not to lick the oven door while it bakes, because WHOA does it smell good. Look, the raspberries turned into jam! JAM!

While you're letting it cool to room temperature (TORTURE, or hard part #2), make dinner. It doesn't even matter what it is, because this tart will be distracting everyone from over there on the counter.


Brown Butter Raspberry Tart
Adapted from Bon Appetit, June 2009

I've adapted the crust to fill a 10-inch removable bottom tart pan. Click the link above if you want the 9-inch pan measurements.

CRUST
8 Tablespoons (1 stick) unsalted butter, melted
1/2 cup plus 1 tablespoon sugar
1/4 teaspoon vanilla extract
1 1/4 cups flour
pinch of salt

Preheat the oven to 375 with a rack in the center. Using a fork, mix together the melted butter, sugar and vanilla. Add the flour and salt and stir. As the butter cools, the mixture will get more and more crumbly. Using your fingertips, press small pieces of dough into the sides of the pan. Spread crumbles of dough in the center of the tart pan, then use your fingers to fuse the pieces together and press it into an even layer. Bake for 18 minutes, until the crust is slightly puffed and light golden brown. Set the crust aside to cool while you work on the filling. Maintain the oven temperature.

FILLING
1/2 cup sugar
2 large eggs
pinch of salt
1/4 cup all purpose flour
1 teaspoon vanilla extract
1/2 cup (1 stick) unsalted butter, cut into small pieces
2 6-ounce containers fresh raspberries

Whisk the eggs, sugar, and pinch of salt in a medium bowl until smooth, then add the flour and vanilla and whisk until smooth again. Set aside.

Have a glass measuring cup ready. In a small sauce pan with a light colored bottom, melt the butter, stirring with a wooden spoon. It will foam, and then the foam will subside. You will be able to see the milk solids on the bottom of the pan, keep stirring so they don't stick. The solids will start to turn brown, but watch them carefully! They'll go from deep nutty brown, which you want, to burnt (no thank you) in a matter of moments. When the butter has browned, immediately transfer it to the glass measuring cup. Slowly whisk the browned butter into the egg mixture, do this a little at a time so the eggs don't scramble.

Stand the raspberries up in the cooled crust, pointy side up, in concentric circles. Carefully and evenly pour the egg and butter mixture over the berries. Bake the tart until the filling is puffed and golden and a tester inserted into the center comes out clean, 40-45 minutes. Mine was ready at 43 minutes. Cool the tart completely in the pan on the rack. When the tart is cool, remove the sides of the pan, cut the tart into wedges and serve. Buttermilk ice cream makes an excellent accompaniment.

Serves 8-10, depending how generous your slices are.

Wednesday, April 29, 2009

In which I am adopted, and make cupcakes.

First, Mom, don't worry! I'm only talking about Adopt-A-Blogger! When I saw on Dine and Dish that Kristen had decided to host the event a third time, I was excited. I had heard about during round two, and doesn't it seem like such a good idea? Baby food bloggers (about a year old or younger - yes, I know I just turned 1, but I have a lot to learn) are "adopted" by more seasoned bloggers for 3 months. I'm lucky to have been adopted by Cheri at Adventures in the Kitchen... Hi Cheri! I'm adding Cheri to my blogroll over there on the right, and you should go check her out. And then you should make popovers, and send them my way. Yum.

On to another delicious pastry item baked in a small container: about those cupcakes. I think they're cheerful looking, but frankly they weren't the best cupcakes I've ever had. Mostly I wanted to make them because I had candied some kumquats and I was expecting visitors... but then that turned into an impromptu trip to Brooklyn and I left the cupcakes in the fridge. This recipe is from the February 2006 issue of Bon Appetit, and the Epicurious reviewers must have been joking when they describe it's "light crumb." I had eaten one before I left, and it was tasty, but not airy and light. I think I folded in my egg whites a little too vigorously. On my return to Boston three days later, they had gotten sort of heavy and more fudge-like, but the flavor is still good, if you like white chocolate.
White Chocolate Cupcakes with Candied Kumquats
adapted from Bon Appetit, February 2006

8 ounces high-quality white chocolate (I used Ghirardelli) chopped
1 3/4 cups all purpose flour
1 teaspoon baking powder
1/2 teaspoon coarse kosher salt
1 cup sugar
3/4 cup (1 1/2 sticks) unsalted butter, room temperature
1 tablespoon vanilla extract
1/2 cup canned unsweetened coconut milk
3 large egg whites
Preheat oven to 325°F. Line a twelve cup muffin pan with paper liners, or not if you use a silicone pan like me. Place white chocolate in metal bowl set over pan of barely simmering water. Stir until melted and smooth.

Whisk flour, baking powder, and salt in medium bowl. Using electric mixer, beat sugar, butter, and vanilla in large bowl until blended. Add warm white chocolate to sugar mixture; stir to combine. Add flour mixture in 3 additions alternately with coconut milk in 2 additions, beating batter just to combine between additions. Batter will be stiff.

Using clean dry beaters, beat egg whites in medium bowl until soft peaks form. Gently fold egg white mixture into batter in 3 additions. The first addition can be stirred quite vigorously, but when folding in the last two additions, be gentle, as you don't want to break the egg white foam.

Divide batter among muffin cups (about 1/4 cup each). Bake until tester inserted into center comes out clean, about 25 minutes. Cool completely before frosting.

White Chocolate Frosting
I left out the white chocolate, and this made a simple cream cheese frosting instead
4 1/2 ounces high-quality white chocolate, chopped
6 ounces (3/4 of 8-ounce package) cream cheese, room temperature
6 tablespoons (3/4 stick) unsalted butter, room temperature
1/4 cup powdered sugar
1/2 teaspoon vanilla extract
1/4 teaspoon coarse kosher salt

Stir white chocolate, if using, in ametal bowl set over saucepan of barely simmering water until melted and smooth. Cool slightly. Using electric mixer, beat cream cheese, butter, sugar, vanilla, and salt in medium bowl until fluffy. Gradually beat in melted white chocolate. Let cool until thickened to spreadable consistency.

Spread frosting over cupcakes. Drain Candied Kumquats (see below); arrange kumquats decoratively atop cupcakes. Leftover candied kumquats can be stirred into your favorite pound cake for delicious results!
Candied Kumquats
Couldn't be simpler! Way less complicated than the orangettes.
20 kumquats, sliced and seeded
1/2 cup water
1/2 cup sugar
Stir water and sugar in small saucepan over medium heat until sugar dissolves. Increase heat and bring to boil. Add kumquats and return to boil. Reduce heat to medium and simmer until fruit is tender and liquid is syrupy, about 20 minutes. Transfer to bowl; cool to room temperature. Keeps for ages in the fridge.

Friday, April 17, 2009

On birthdays, or, Chocolate Coffee Cake with Mocha Mascarpone Frosting

I am not one of those people who "just forgets to mention" their birthday. Every year I think to myself, be cool, Adrienne, it's not a big deal, I'll only mention it if anybody asks me what I'm doing this weekend. And then I never, EVER succeed at keeping my mouth shut. I mean, I don't shout it from the rooftops or tell strangers on the T about it, but if you mention "February 7th" in conversation, I'm going to tell you it's my birthday.

We're well past that now, and I had a very nice party with a delicious birthday cake baked by my non-baking boyfriend. (He's so sweet!) But there are other birthdays in the year, and that's really what we're here to talk about. Today is my mom's birthday (happy birthday, Mom!) and yesterday was my sister's birthday (happy birthday, Julia!). Next week there are some cousins' birthdays, tomorrow there are TWO friends' birthdays but alas, only one party. And this past Tuesday, April 14th, was this blog's first birthday!


And since what's a birthday, really, other than an excuse to eat some cake, let's talk about this tasty specimen, shall we? I made this Coffee-Chocolate Layer Cake with Mocha-Mascarpone Frosting from the April 2009 issue of Bon Appetit for a friend's birthday at the end of March. Like all the best chocolate cakes, the cake itself is light and moist (from the buttermilk) and the flavor is positively miles deep - I finally got some real espresso powder instead of the Maxwell House I'd been using, and I think that has something to do with it.

The frosting, on the other hand, is not what I had hoped. It's DELICIOUS, don't let me sway you from making it at ALL, but if you look at the photo in that link to the original recipe, you'll see why I was a little disappointed. I'm not surprised that it's so light given the 16 ounces of mascarpone cheese, but I'm still not convinced that this is the frosting on the cake on BA's photos. The response to all the why-is-my-frosting-so-light queries in the comments is something along the lines of "the photos are, uh, dark, and we used, uh, high quality cocoa." Hm. Not sure I'm buying it, but I'm going to try again. Either way, even if you pipe the light brown frosting rather messily from a plastic bag with the corner snipped off as I did, and it doesn't look all that pretty, it does indeed taste like a mocha latte. That is to say, really freaking good. Happy birthday, everyone.

Coffee-Chocolate Cake with Mocha-Mascarpone Frosting
adapted from Bon Appetit, April 2009

Cake
2 cups cake flour
3/4 cup natural unsweetened cocoa powder (use the best you can)
1 1/2 teaspoons baking soda
3/4 teaspoon salt
3/4 cup (1 1/2 sticks) unsalted butter, room temperature
2 cups (packed) golden brown sugar
3 large eggs
1 1/2 teaspoons vanilla extract
1 cup buttermilk
4 teaspoons instant espresso powder dissolved in 3/4 cup hot water (don't use instant coffee, the real espresso powder is worth it!)

Frosting
1/3 cup natural unsweetened cocoa powder (use the darkest you can find)
1 tablespoon instant espresso powder
1 1/2 cups chilled heavy whipping cream, divided
1 1/3 cups sugar
2 8-ounce containers chilled mascarpone cheese
Bittersweet chocolate curls (optional) (clearly I didn't make beautiful "curls," but my shards look ok, right?)

Cake

Position rack in center of oven; preheat to 325°F. Generously butter two 9-inch cake pans with 2-inch-high sides; dust with flour, tapping out any excess. Line bottom of pans with parchment paper. I used three 9-inch pans because mine don't have 2-inch sides, so I ended up with a 3-layer cake, which I think is fancier anyway.

Sift 2 cups cake flour, cocoa, baking soda, and salt into medium bowl. Using electric mixer, beat butter in large bowl until smooth. Add brown sugar and beat until well blended, about 2 minutes. Add eggs 1 at a time, beating well after each addition. Mix in vanilla. Add flour mixture in 3 additions alternately with buttermilk in 2 additions, beating just until blended after each addition. Gradually add hot espresso-water mixture, beating just until smooth.

Divide batter between pans; smooth tops. Bake cakes until tester inserted into center comes out clean, about 40 minutes. Mine only took 35 since I used 3 pans and my layers were thinner. Cool cakes in pans on rack 15 minutes. Run small knife around sides of pans to loosen cakes. Invert cakes onto racks; lift pans off cakes and remove parchment. Place wire rack atop each cake; invert again so top side is up. Cool completely. You can make the cakes a day ahead, wrap them in plastic, and store at room temperature - I did!

Frosting

Sift cocoa powder into large bowl; add espresso powder. Bring 1 cup cream to boil in small saucepan. Slowly pour cream over cocoa mixture, whisking until cocoa is completely dissolved, about 1 minute. Add 1/2 cup cream and sugar; stir until sugar dissolves. Chill until cold, at least 2 hours. The mixture will be very dark and may give you false hope about the color of your frosting.

Add mascarpone to chilled cocoa mixture. Using electric mixer, beat on low speed until blended and smooth. Increase speed to medium-high; beat until mixture is thick and medium-firm peaks form when beaters are lifted, about 2 minutes (do not overbeat or mixture will curdle).

If your cake layers are even, good for you. How'd you do that? If not, level the bulbous tops with a long then knife (a serrated bread knife works well). Using a pastry brush, brush off crumbs from cakes. (BTW, best idea ever, and the first time I've ever seen it written into a recipe!) Place 1 cake layer, top side up, on platter. Spoon 1 3/4 cups frosting in dollops over top of cake. Using offset spatula, spread frosting to edges. I always eyeball the amounts between layers and I was conservative since I had an extra layer, but I ended up with extra frosting. Top with second cake layer, top side up, pressing to adhere. Spread thin layer of frosting over top and sides of cake. (Repeat with third layer if necessary) Chill 10 minutes. Using offset spatula, spread remaining frosting over top and sides of cake, swirling decoratively. Top with chocolate curls, if desired. Can be made 1 day ahead and chilled, covered with a cake dome. Let stand at room temperature 20 minutes before serving.

Friday, April 3, 2009

Irish Coffee Crunchies

In December, in addition to their usual cookie issue, Gourmet published an online feature: the best cookie recipe from each year they've been published.

I think it's a very cool idea. And these Irish Coffee Crunchies from 1977 are the second recipe I've tried from the feature. (The first was the honey refrigerator cookie from 1942, which tastes strongly of whatever honey you choose, so choose wisely, and is excellent with both cheese and chocolate fondues.)

These cookies were not my favorite, I may as well tell you. They were yummy in the way that all cookies are, for sure. And I like all the things that go in Irish Coffee, and I fully expected to l-o-v-e these, but the flavor wasn't strong enough for me. There's coffee in the cookies and the frosting, but mostly I just tasted crunchy oatmeal cookie. Good crunchy oatmeal cookie, but not what I had expected.

But here's the thing: my friends loved them. I put them on a plate with a note that said "please eat" when I was on my way out and when I got home, I heard the rave reviews. Someone actually said "best cookie ever" but I can't remember who to ask them why. You'll have to make them and decide for yourself!

Some of the comments online about these cookies claim that there must be something wrong with the dough! because it's difficult to roll out. It is, but it's not impossible. Add another teaspoon or two of coffee if it's really driving you mad, but persistence works, too. And make sure you get it to 1/8th of an inch, the thick ones are on the dry side. Oh, and one more thing - the recipes were published the same way they were in their respective years "in the interest of authenticity" so that's why the ingredient list is part of the instructions. Read it through once or twice before you start so you know you have everything you need.

Irish Coffee Crunchies

Gourmet, August 1977, via Gourmet's Favorite Cookies 1941-2008

In a bowl beat 1 stick (1/2 cup) butter, softened, with 1/4 cup sugar until the mixture is fluffy. Beat in 2 teaspoons each of Irish whiskey and strong coffee and 1 teaspoon heavy cream. Add 2 cups quick-cooking oats and 1 cup flour sifted with 1 teaspoon double-acting baking powder and combine the mixture to form a dough. Roll out the dough 1/8 inch thick on a floured surface and with a 2 1/4-inch cutter cut out rounds. Bake the rounds on a buttered baking sheet in a preheated moderate oven (350° F.) for 15 minutes, or until they are lightly colored. Transfer the rounds to a rack and let them cool.

In a small bowl combine 2 teaspoons each of Irish whiskey and strong coffee and 1 teaspoon heavy cream. In a bowl combine 1 cup confectioners’ sugar, sifted, and the coffee mixture, stir in 3 teaspoons boiling water, a little at a time, and beat the icing, adding a few drops more water if necessary, until it is smooth and of spreading consistency. Spread half the rounds thinly with the icing, top them with the remaining rounds, and coat the cookies with the icing. Transfer the cookies to a rack and let the icing set. Makes about 18 cookies.

Monday, February 9, 2009

Make your own gummy candies! Sort of.

Ok so technically they're called orangettes. But they taste like orange flavored gummy candy, except way, way better. (It's a good thing I have this space to unleash my brilliant writer's mind, because I am so descriptive.)

I'm not really sure what posessed me to make these. My mom sent me a link to somebody's blog which linked me to the Martha Stewart recipe and I thought oh hey, those look nice.

Plus someone at work had mentioned that the oranges in the grocery store are really good right now. I cut Martha's recipe in half (I only used three oranges) and then I ate THREE oranges in a 24 hour period. They are really good right now.

Getting the peel off was a little tricky, and trimming the excess bitter pith was sort of a pain, but I think the end result was worth it. I had a birthday party for myself on Saturday night (birthday on a Saturday, word) and these were a hit.

Also a hit: the birthday cake Adam made! He made two and layered them into one cake with raspberry jam - highly recommended. And no butter! What?

I didn't take a photo of the dredging in sugar step, because, well, my hands were covered in sugar. In the summer, I plan to garnish girly cocktails with these. And I can't wait to try them with other citrus fruits. I think grapefruits would be killer.


Candied Orange Peel
adapted from Martha Stewart

3 medium navel oranges
3 cups granulated sugar, plus more for rolling
3 cups water

Directions:

Using a paring knife, make six shallow cuts in each orange from top to bottom, cutting through the rind but not into the fruit. Use your fingers to gently loosen the six sections of rind off each orange. Use a longer, sharp knife to carefully slice off any extra white pith. Slice rind sections lengthwise into 1/4-inch to 1/8-inch strips. I got four strips out of each section of peel. Place strips in a pot, cover with cold water, cook on high heat just until the water starts boiling. Drain and repeat (cover with cold water, bring to a boil, drain and set aside).

Combine water and 3 cups sugar in a large, wide-mouth pot, cook over medium-high heat until mixture is boiling and sugar has completely dissolved. Carefully add sliced rinds into pot, turn heat down to medium, leave on a rapid simmer for about an hour, until rinds are translucent. Remove pot from heat, use tongs or a slotted spoon to fish out all the slices from the syrup & arrange in a single layer on a wire rack placed over a baking sheet or old newspaper. Pat a couple of paper towels on top of rinds to lightly blot up any excess syrup but do not dry completely. Dredge slices in extra granulated sugar until well coated, return to wire rack to cool completely. Store in an airtight container at room temperature.

Sunday, November 23, 2008

Chocolate Peanut Butter Cake

Hello, lover. Chocolate. Peanut Butter. Cake. Are there any more beautiful words in the English language? Sigh...
Oof, sorry, I was in a reverie. A peanut butter cream cheese frosting induced reverie. I know, weird, right? Peanut butter and cream cheese, and it is SO good. I ate the leftovers on graham crackers once the cake was thoroughly frosted.

I've been eyeing this recipe for months, but I didn't have any occasion to make it, until Michelle at work announced she's having a baby, and she didn't mean getting another puppy.

This was the finale of the baby shower Hugh and I hosted last week, and I think it was quite well received... though we did manage to save a piece for Jack (the husband/baby daddy).

If you like peanut butter cups and rich desserts, give it a try. Oh! Or try it as cupcakes... I bet they would be easier to frost. You could skip the glaze, too... hm. I'm giving myself ideas.

Sour Cream-Chocolate Cake with Peanut Butter Frosting and Chocolate-Peanut Butter Glaze
adapted from Sky High, Irresistible Triple Layer Cakes, via Smitten Kitchen

Makes an 8-inch triple-layer cake; serves 16 or more

2 cups all-purpose flour
2 1/2 cups sugar
3/4 cup unsweetened cocoa powder
2 teaspoons baking soda
1 teaspoon salt
1 cup neutral vegetable oil, such as canola
1 cup sour cream
1 1/2 cups water
2 tablespoons distilled white vinegar
1 teaspoon vanilla extract
2 eggs

1. Preheat the oven to 350 degrees F. Butter the bottoms and sides of three 8-inch round cakepans. Line the bottom of each pan with a round of parchment or waxed paper and butter the paper.

2. Sift the flour, sugar, cocoa powder, baking soda, and salt into a large bowl. Whisk to combine them well. Add the oil and sour cream and whisk to blend. Gradually beat in the water. Blend in the vinegar and vanilla. Whisk in the eggs and beat until well blended. Scrape down the sides of the bowl and be sure the batter is well mixed. Divide among the 3 prepared cake pans.

3. Bake for 30 to 35 minutes, or until a cake tester or wooden toothpick inserted in the center comes out almost clean. Let cool in the pans for about 20 minutes. Invert onto wire racks, carefully peel off the paper liners, and let cool completely. I took Deb's advice here and froze the layers on paper plates, thank goodness, because this is a very very soft cake.

4. To frost the cake, place one layer, flat side up, on a cake stand or large serving plate. Spread 2/3 cup cup of the Peanut Butter Frosting evenly over the top. Repeat with the next layer. Place the last layer on top and frost the top and sides of the cake with the remaining frosting. Chill the frosted cake thoroughly.

5. To decorate with the Chocolate–Peanut Butter Glaze, simply pour the warm glaze over the top of the cake, and using an offset spatula, spread it evenly over the top just to the edges so that it runs down the sides of the cake in long drips. Refrigerate, uncovered, for at least 30 minutes to allow the glaze and frosting to set completely. Remove about 1 hour before serving.

Peanut Butter Frosting aka the frosting that killed my hand mixer
Makes about 5 cups

10 ounces cream cheese, at room temperature
1 stick (4 ounces) unsalted butter, at room temperature
5 cups confectioners’ sugar, sifted
2/3 cup smooth peanut butter, preferably a commercial brand (because oil doesn’t separate out)

1. In a large bowl with an electric mixer, beat the cream cheese and butter until light and fluffy. Gradually add the confectioners’ sugar 1 cup at a time, mixing thoroughly after each addition and scraping down the sides of the bowl often. Continue to beat on medium speed until light and fluffy, 3 to 4 minutes.

2. Add the peanut butter and beat until thoroughly blended.

Chocolate-Peanut Butter Glaze
Makes about 1 1/2 cups

8 ounces seimsweet chocolate, coarsely chopped
3 tablespoons smooth peanut butter
2 tablespoons light corn syrup
1/2 cup half-and-half

1. In the top of d double boiler or in a bowl set over simmering water, combine the chocolate, peanut butter, and corn syrup. Cook, whisking often, until the chocolate is melted and the mixture is smooth.

2. Remove from the heat and whisk in the half-and-half, beating until smooth. Use while still warm.