Thursday, November 18, 2010

Momofuku's Soy Pickled Shiitakes

Momofuku's soy pickled shitakes


I pickled these mushrooms to go with a feast of sorts we had on Sunday. I needed a big project to kick myself off the couch and back into the kitchen, and since it was decidedly soup weather, it seemed as good a time as any to tackle pho. I used a mash up of Andrea Nguyen's recipe, and the interpretation of it over at Steamy Kitchen. (Aside: any Boston area readers know where I can find yellow rock sugar? I couldn't track it down at the Reliance Market in Union Square.)

The pho broth simmered for a few hours while I pleated dumplings and Adam put the leaf in the table. I whizzed raw shrimp in the food processor - not very pretty, but the shrimp toasts were delicate and crunchy, so it was worth the cleaning (ahem, Adam does the dishes). And then I pickled these mushrooms. They practically sing in your mouth, they are so flavorful and vibrant. I've been eating the leftovers out of the fridge every time I walk by, and I bet they'd be fantastic in a cold noodle salad.

Soy Pickled Shiitakes
Adapted, just barely, from Momofuku

Dried mushrooms at the regular grocery store can be pricey, but if you head to an Asian market you can get a one ounce bag for ninety-nine cents. Just be warned, once you start exploring the aisles you may not be able to stop at just mushrooms. 

4 cups (loosely packed) dried shiitake mushrooms - about 3 ounces by weight
1 cup sugar
1 cup soy sauce
1 cup white wine vinegar (or sherry vinegar if you can find it, I couldn't)
1 thumb-sized knobs of ginger, peeled

Re-hydrate the mushrooms in hot water (doesn't have to boil, just really hot) for 15 minutes or so or until the mushrooms are softened. Once the mushrooms are soft, lift them out of the soaking liquid; strain the liquid through cheesecloth or a fine mesh strainer to remove any sand or debris and reserve the liquid. Remove the stems from the mushroom caps and discard. Slice the caps into 1/4 inch wide slices.

Combine the mushrooms with 2 cups of the reserved soaking liquid, sugar, soy sauce, vinegar and ginger in a sauce pan. Bring to a simmer over medium heat, then reduce heat and simmer (gently, please) for 30 minutes. Allow the mushrooms to cool in the liquid.

Pack the pickled mushroom slices into a quart size container and add enough of the cooking liquid to cover. They'll keep in the fridge for a month or more, but they're ready to eat now, hooray!

Monday, November 8, 2010

Stone Soup Farm CSA: Weeks Eighteen and Twenty

Stone Soup Farm CSA Week Eighteen

Ok, yes, I am writing this post because I feel guilty. Guilty because we pick up our first winter share tomorrow, and I never told you about our last two shares of the regular season! First, week Eighteen: onions, garlic, potatoes, tatsoi, leeks, cilantro and salad greens. As I recall, we let the tatsoi rot in the crisper drawer while we were on our honeymoon.

Week Nineteen: Finn and Heather picked up our share while we were on our honeymoon. Thanks for giving it a good home, guys!

Stone Soup Farm CSA Week Twenty

Week Twenty, aka the last week of the regular season, BOO. A couple of green peppers, garlic, potatoes, onions, butternuts, kale, popcorn (hidden in the kale there), cilantro and a couple of ornamental gourds that are still sitting pretty on our coffee table. In fact, I took a very dramatic picture of them the other day.

I don't have a recipe for you today, I'm sorry, dudes. Here's the thing about cooking school: it doesn't leave a ton of time for actual home cooking. We've been surviving on quesadillas and slow-cooker beans and breakfast-for-dinner type situations. Last week I used leftover brioche dough from class to make a deep dish pizza of sorts. Yesterday we had popcorn for dinner. Sigh.

Anyway, our first winter share pickup is tomorrow, so there will be a big pile of tasty things waiting to be cooked, and I'll be back with a right and proper meal type item. 

Thursday, October 28, 2010

Lamb Burgers with Walnut Sauce

Lamb Burger


I read a lot of blogs. And I buy a lot of cookbooks. Sometimes the two collide, and I read cook-through blogs like Alinea at Home or Momofuku for 2, or, more pertinent to this post, Melissa Cooks Gourmet. These brave souls are channeling Julie Powell and cooking all the way through a cookbook. Melissa started out with the original yellow-bound Gourmet cookbook, but since Gourmet Today came out last winter she has also featured a few recipes from the new edition. 


Which brings us to these lamb burgers. I actually own Gourmet Today, but I tend to be a little guilty of ignoring my cookbooks, so when Melissa mentioned this recipe that is right there on page 486 I got up out of my chair and grabbed the book off my shelf. I actually got up, that is how moved I was by the idea of a lamb burger. 


And allspice! Seriously, why didn't anybody ever tell me about allspice before? There's actually only a quarter teaspoon in these burgers, but it goes so well with lamb that's really all you need. It's such a strong flavor though; don't be tempted to throw in any extra or you risk it overpowering the savory-ness and making your burgers taste like Christmas cookies.


A few notes about construction: I skipped the food processor. I just chopped my onion and herbs into really small pieces, and I swear I had the best of intentions - I wanted to practice my brunoise cut (1/8th inch cubes) on onions, which I still have trouble with. In hindsight, there may be a reason for you to pulse the mixture in a food processor. It would be more cohesive and less likely to fall apart when you try to flip it. I tried to flip one but it didn't work, so I just left them on the original side until they cooked through, which took more like fifteen minutes than "five to seven," but my oven is... persnickety. 


Oh, and if you're feeling ambitious, this white whole wheat pita recipe from King Arthur is very good. Oh again, and the salad is just white beans, cherry tomatoes, black olives and green peppers with a little olive oil and red wine vinegar and a little blue cheese from Sugarbush Farm


Lamb Burgers with Walnut Sauce
adapted from Gourmet

makes 4 burgers

Per my notes above, you could easily make the burgers in a food processor as the original recipe suggests, I'd just chop the onion into big chunks instead of chopping it very fine and zap the onion and bulgur together a bit before adding the rest of the ingredients.

For the walnut sauce:
1 small clove garlic
1/2 teaspoon salt
1/2 cup chopped walnuts
2 teaspoons lemon juice (or to taste)
1/8 teaspoon cayenne
1/4 cup water

Mash the garlic clove into a paste with the salt using the flat edge of a knife, then mix it with the rest of the ingredients in a food processor until well blended. Taste and adjust seasoning if necessary, mine needed more salt and more lemon juice.

For the burgers:
1 cup boiling hot water
1/3 cup bulgur wheat
3/4 teaspoon salt
1 small onion, diced as fine as you can get it
1/4 cup finely chopped parsley
1/2 teaspoon paprika
1/4 teaspoon allspice
1/4 teaspoon freshly ground black pepper
1/4 teaspoon cayenne
1 lb ground lamb
4 small (4 inch) pita breads for serving, plus lettuce if you're going the sandwich route

Put the bulgur and salt in a bowl, and pour the boiling hot water on top of it. Let it sit for fifteen minutes or so until the bulgur plumps up. Drain it thoroughly in a strainer.

Mix the drained bulgur with the rest of the ingredients in a bowl, being careful not to over-mix. Form the mixture into four patties. At this point you can refrigerate the burgers, loosely covered in plastic wrap, for a couple of hours if you need to, or for ten minutes while you pre-heat the broiler.

Cook the burgers under the broiler until they are cooked through, turning once if you can. The recipe suggests 5-7 minutes, but mine took more like twelve minutes.

Serve the burgers topped with the walnut sauce, in or on warm pita bread. We stuck a little lettuce in ours for crunch, too. Enjoy!

Thursday, October 21, 2010

And Now We're Married

It's true what they say about your wedding day flying by. It was a wonderful day, sunny and warm for New England October, but it seemed like we woke up, put on our party clothes and BOOM, it's over. Who's taking home the centerpiece? Is there any cake left? (No, there was not. I only had about four bites of cake and I WANT MORE.)


These wedding photos were taken by our photographer David Barnes. If you want to see more wedding photos, you can see some on Facebook on the David Barnes Photography page. I also want to point out that David is awesome: he is calm and collected even though we didn't have a ton of time for photographs (read: didn't stress us out one bit) and he still managed to get a ton of awesome shots. I can't wait to see the whole set!

Two other local Somerville businesses were totally awesome, so if you're in the market for flowers check out Nellie's Wildflowers in Davis Square. My bouquet was freaking gorgeous and it had baby pine cones in it! The centerpieces were exactly what we wanted, even though I was vague and unhelpful with my ideas. Our amazing cake was from Lyndell's bakery in Ball Square: holy chocolate frosting. I might have to go down there on our one month-iversary (please, did you think I was going to wait a year?) and get myself a tiny cake just so I can eat more of it. Four bites is not enough. 

Queechee Gorge

The day after the wedding we headed home from the Museum, packed up, and drove up to Woodstock, Vermont, to the Village Inn (warning: their website plays music) for a three day mini honeymoon (mini-moon?). It was perfectly delightful even if we were the youngest tourists in town. The thing is, retirees make dinner reservations, and we are young! and crazy! and newlyweds! Which means we only had reservations for one night (at Simon Pearce, where we had a gift certificate from the best man - thanks Tyler!) Luckily, there are tons of awesome restaurants in and around Woodstock and we managed to find great food every night. We had a really wonderful crab cake that I can't wait to recreate at Richardson's Tavern, and the house special whole fish at Mangowood was crispy and flavorful. 

I'm winning!

In addition to awesome food (breakfast at the Village Inn was unbelievably good), we got in two solid mornings of hiking and plenty of cribbage. We also tasted cheese and maple syrup and brought home plenty of deliciousness to savor for the next little while.

286/365: Woodstock

We've been back in Boston for about a week, and it's been a little weird adjusting back to real life. Not much is different, except that Adam wears a ring now. He still goes to work, I still go to school (oh, and I got a part time job doing prep work, so I go there, too, and make hundreds of spinach triangles), but we're not planning a wedding any more. Frankly, it's pretty nice. 

289/365: Raw Kale Salad

I'll be back again soon enough with something more substantial, but to ease back into things, here's a blurry picture of a salad for fall that we had a few days after we got back. It's made with a bunch of raw lacinato kale, center ribs removed and sliced into 1/4 inch strips, one sliced honeycrisp apple, and a nub of diced smoked gouda, with a handful of chopped walnuts for crunch. The dressing is red wine vinegar, salt, and olive oil, and you can just mix it all up and let it sit for an hour while you make the rest of dinner if you want. Raw kale can stand up to the vinegar without wilting much; it's even good the next day! 

Friday, October 1, 2010

Stone Soup Farm CSA: Week Seventeen

Stone Soup Farm CSA Week Seventeen

Week Seventeen. You know what that means, right? It's almost over. CSA season is winding down. Luckily we signed up for a winter share, so we'll get a couple of large shares each month in November and December, but I'm trying to reconcile myself to buying grocery store vegetables again, eventually.

Speaking of which: have you seen this video from the Boston Public Market Association? Take two minutes and watch it, and if you have time or inclination, take another two minutes and email the governor to show your support. As someone who wants to be buying local produce year round, I would consider it a personal favor.

Oh, right! This week's share from Stone Soup: two delicata squash, two pounds of sweet potatoes, a few hot peppers, a pound of carrots, a bunch of chard, a few shallots, a bunch of parsley, a watermelon (the last one, according to the sign), and two small eggplants (one is hiding behind the squashes). We made an  awesome recipe from Dana Treat last night and ate sweet potato wedges with yogurt dipping sauce alongside sauteed garlicky chard. I only changed one thing, subbing parsley which we had for cilantro which we didn't, so I won't write out the recipe, but if you've got an abundance of sweet potatoes I highly recommend it. And don't skip the sauce! Have a great weekend, my friends.

Tuesday, September 28, 2010

Tofu and Tomato Stir Fry

Tofu and Tomato Stir Fry

This is weird, right? Tofu and tomatoes together? I know, that's what I thought, too. Tomatoes are not the first thing I think of when I think tofu (soy sauce is the first thing I think of when I think tofu). And tofu is not the first thing I think of when I think tomatoes (basil is). And I admit, it took me a few bites to decide that I liked this; it's not clear immediately that they play well together. Which I guess is really not something I should say if I want you to make this, huh?

242/365 Tomato Butt

However, I had an overflow of tomatoes from our CSA (clearly I made this a few weeks ago) and I  didn't want pasta or caprese or tomato sandwiches... and I had tofu in the fridge. So I googled. And  came across this little number on Epicurious, from Charles Phan, the chef at the famed Slanted Door restaurant in San Francisco. I was skeptical, but you can't learn if you don't try, right? And while it wasn't the obvious home run combo of chocolate and peanut butter or figs and bacon, tofu and tomatoes was good. Good enough that you shouldn't discount it immediately, is what I'm saying. Give it a try. I'm curious to know what you think.

243/365 Fried Tofu

Since I am, ahem, prone to adjusting recipes based on what I have, I made a few changes to the original. First of all, I don't often deep fry at home, so I used my usual tofu frying method: shallow oil, cast iron skillet. If you wanted it crispy you could dredge it in corn starch first. I added a bell pepper because there was one in the crisper. And I used rice vinegar instead of mirin because I was out of mirin. You could add more vegetables if you had them, I bet broccoli rabe or arugula would be a nice counterpoint to the sweetness of the tomatoes.

Tofu and Tomato Stir-Fry
Serves 3-4

I like to press my tofu before I slice and cook it so it lets go of a lot of water and absorbs the marinade better. I find that it improves the texture and makes it easier to stir-fry. I prop up one end of a cutting board so it slopes into the sink at just a slight angle, then put the tofu on the cutting board. Lay a paper towel on the top of the tofu, then balance a saute pan on top and put a couple of cans of whatever's in the cupboard in the saute pan to give it some extra weight. Then I just leave it alone for half an hour or so. It's less precarious and easier to set up if you don't  make the cutting board slope into the sink, but then the tofu just sits in a puddle of its own liquid instead of really draining. Remind me to take a picture of this step next time I blog about a tofu recipe...

14 ounces firm or extra firm tofu (I generally buy Nasoya brand, which comes in 14 ounce packages, but up to a pound is fine), cut into bite-sized cubes
1/4 cup canola or vegetable oil
3 tablespoons soy sauce
1 tablespoon sriracha or similar hot chile sauce
3-4 medium sized ripe tomatoes, cut into wedges (about a pound)
3 cloves garlic, minced
1/2 a large onion or a whole small onion, sliced
1 bell pepper, sliced into strips
2 tablespoons rice vinegar (preferably unseasoned)

cooked white or brown rice for serving
basil chiffonade or sliced green onions for garnish

Mix the soy sauce and sriracha together in a medium bowl. Pat the tofu pieces dry, then add them to the marinade in the bowl, tossing gently to coat each piece. Let stand 15 minutes while you cut the vegetables.

Heat the canola oil in a large wide skillet over medium high heat. Add one piece of tofu; if it sizzles, add the rest. You may have to do this in batches. Cook, turning occasionally so all sides brown, until the tofu is golden brown and crispy on the edges. Remove from pan and drain on paper towels or a paper bag.

Turn the heat down to medium and add the onion slices, cook for 2 minutes until the onion is just starting to go translucent, then add the garlic and bell pepper strips. Cook for about a minute, stirring constantly so as not to let the garlic burn, until the pepper is just tender (it will still be crispy, add it with the onion if you prefer a softer pepper). Add the tomato wedges and cook for just a couple of minutes until the tomatoes start to break down and give off juice. Add the rice vinegar and cook for about a minute to deglaze the pan, then add the tofu to the pan and stir to combine everything, then remove from heat and serve over rice. Season with salt (or soy sauce) and garnish with strips of basil or green onions if you like.

Saturday, September 25, 2010

Stone Soup Farm CSA: Week Sixteen

264/365: Stone Soup Farm CSA Week 16
If you are like me, the first thing you will notice is the lack of tomatoes in this share. Le sigh... but! there are still tons of 'maters in the farmer's markets, so I'm not quite done with them yet. I bought a huge yellowy pink heirloom whose proper name escapes me now, but I munched on juicy slices of it over buttered sourdough toast all week for breakfast...

Ahem. As for what I did with this share, honestly I was so busy at school and with wedding stuff this week that we haven't had many right and proper dinners. I have seminar Tuesday nights and I snack early and often so I won't be hungry in class. Wednesday we made pate a choux in Baking class and I ate a whole lot of Dauphine Potatoes and Cream Puff Swans so never really ate dinner. I assisted at a recreational class - The Wines of Italy - at school Thursday night so I munched on caponata and prosciutto and cheeses (oh, scamorza, you are so delicious and fun to say!) instead of dinner. It is sort of funny how cooking school is giving me this weird eating habits.

Anyway, we ate the corn sauteed with chipotle powder and butter next to our huevos rancheros this morning, the lettuce and a few cucumbers in today's lunch salad. I used some purple basil in the dressing. The peppers got tucked into some curried apple chutney I canned with last weekend's bounty, and the garlic whizzed into the salsa verde I canned yesterday.  Tonight Adam's making quesadillas and I'll probably try roasting the green beans, which I've never done before. Delicata squash will be roasted and filled with rice and maybe sausage for tomorrow's dinner.

I know this isn't my most exciting CSA post of all time, but guys, our wedding is two weeks from tomorrow. We have 100 favors to wrap, a seating chart to finish, and Adam still doesn't have shoes to go with his suit. Seriously. I beg your forgiveness if posting is light until AFTER October 10th. Thanks, dudes.

Sunday, September 19, 2010

Sunday Night Special: Apple Picking

Apple pickin'

It's fall in New England, which means it's time for cider doughnuts. The thing about cider doughnuts is that they're best hot and fresh from the farm where the cider is pressed, so in order to get cider doughnuts, you have to go to an apple orchard. While you're there, you might as well pick some apples.

We like Cider Hill Farm in Amesbury, MA, though this year we arrived a week too late to pick peaches - it's been such a warm season in New England that every crop is about two weeks early this year, which means they also finish two weeks early! Cider Hill has five apple orchards with several different varieties of apple grown in each orchard. We got Cortlands, Galas, a few Macintosh and some Honeycrisps (my favorite for plain old eating) and then we grabbed a few Fortunes, a new variety. As you can see from my ridiculous expression below, I was pretty shocked by how enormous the Fortune apple is.

Apple the size of my head!

Thanks to Adam for letting me climb on his shoulders to pick the ripe ones, and thanks to Julia for taking pictures! So is there an apple picking tradition near where you live? Do you have a favorite orchard? What's your favorite kind of apple?

Thursday, September 16, 2010

Stone Soup Farm CSA Week Fifteen

257/365: Stone Soup Farm CSA Week Fifteen

I know I said this last week, but I love this part of the year, all the jumping back and forth between fall produce and summer vegetables. Last week we got acorn squash and cabbage, this week eggplant and corn. And also: two pounds of carrots, two tomatoes, three big potatoes, a few onions, a head of broccoli, and a bunch of parsley.

It feels like I haven't quite gotten my fill of eggplant yet this year (I've actually got another eggplant recipe on the docket), so I bought another eggplant at the farmer's market on the way home from picking up the CSA. Last week's cabbage was still in the fridge, and I thought they might be nice together. I tossed the sliced eggplant with a little oil and some five spice powder, then baked it at 400 degrees for about 20 minutes. I like baking eggplant because you can use much less oil - eggplants are super absorbent, and if you cook them in a pan with oil every time you turn around the pan will be dry. I sauteed the shredded cabbage with some homemade hot sauce and added some soba noodles for bulk. Hot spicy plus five spicy equals delicious dinner.

258/365: Spicy Cabbage and Five Spice Eggplant

Five Spice Eggplant with Spicy Sauteed Cabbage
serves 2-3

I thought about calling this a stir-fry because it's sort of in that vein, but, um, I baked half of it. If you didn't make your own hot sauce (but why? it's so easy and delicious!) then use sriracha or something similar. I'd use two small eggplants instead of one large one, and if you can find the skinny Japanese kind, that would be ideal. Don't use the biggest eggplant you can find, the big ones are often bitter so it's not really a good shortcut.

2 small eggplants
3 tablespoons vegetable oil
1 1/2 teaspoons five-spice powder
1/2 teaspoon dark sesame oil
1 medium head napa cabbage
1 tablespoon chili garlic hot sauce (more or less to taste)
2 cloves garlic, minced
2 more tablespoons vegetable oil
another 1/2 teaspoon sesame oil
1/2 package soba noodles
salt
chopped chives for garnish

Preheat the oven to 400. Slice the eggplants about 1/3 inch thick in halves or quarters depending on the size of the vegetable. Combine three tablespoons of vegetable oil, 1/2 a teaspoon of sesame oil and the five-spice powder and toss with the eggplant slices, making sure each slice is coated. Line a baking sheet with aluminum foil and lay the eggplant slices out on it in a single layer, sprinkle with salt, then bake for 20 minutes. You may want to flip them once if you think of it.

Slice the cabbage into thin strips. Heat a large saute pan over medium high heat add two tablespoons of vegetable oil. Add the cabbage, in batches if necessary - maybe let half of it cook down before you add the other half. After a all the cabbage is in the pan, add the garlic and hot sauce and continue cooking until cabbage is just tender. Turn off the heat if the eggplant isn't done yet.

Meanwhile, bring a pot of water to a boil and cook the soba noodles according to package directions.

When the eggplant is tender, remove it from the oven and add it to the pan with the cabbage. When the noodles are done, drain them and add them to the pan as well. Toss to combine, plate, and garnish with chives.

Wednesday, September 15, 2010

Homemade Pop Tarts

Blueberry Pop Tarts

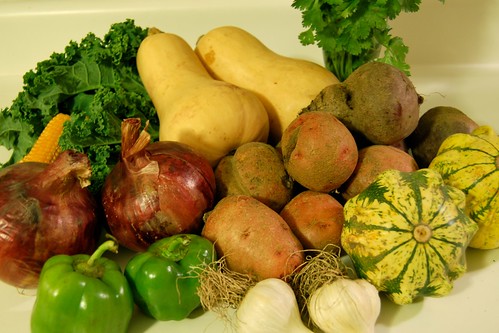
My first week of classes is already over, can you believe it? On day one, in Food Basics, I learned how to turn on the oven... but only after my "roasted beets" had been in there for an hour decidedly not roasting. Whoops! Tuesday night in seminar I picked out my chef's knife. It's the biggest knife I've ever used - ten inches long with an extra wide blade - not unlike a sword, actually, but after puzzling out the rhythm of cutting on a pile of produce, (potato: medium dice, carrot: brunoise, onion: dice, orange: supreme, cabbage: chiffonade), I switched back to the eight inch as an experiment and I kept wondering where the rest of the knife was.

Blueberry pop tarts

This morning in Baking I made some darn tasty granola and learned the importance of keeping up with the dishes... by which I mean oh boy there are a lot of dishes to do. I am having a freaking blast, but I've got to say, it's kind of weird to be going back to school. It's such a heavily weighted phrase, don't you think? I always think of You've Got Mail, when Meg Ryan emails Tom Hanks (who of course she doesn't yet know is Tom Hanks, duh) "Don't you love New York in the fall? It makes me want to buy school supplies. I would send you a bouquet of newly-sharpened pencils if I knew your name and address." Well, I made not be in New York, and my supplies are running more along the lines of sharpened blades than sharpened pencils, but there's still that sense of freshness, of new, of starting something great.

Blueberry Pop Tarts

Speaking of great, lets talk about these so-called pop tarts. When my cousin Becca comes up to Boston, I made brunch. It's become a thing, if you will, and so I am always on the lookout for tempting breakfast pastries. Last time she was here, I made those 
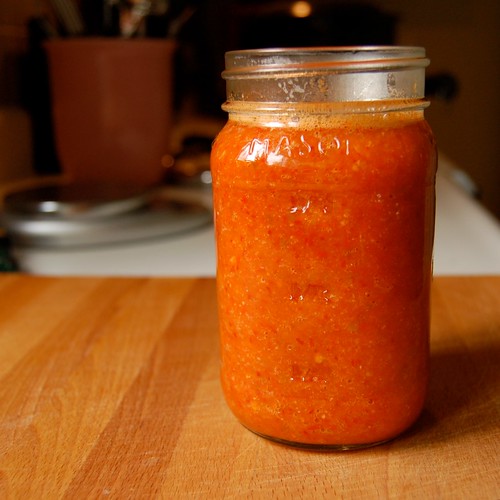
jam-filled buttermilk biscuits, and since I went on that 
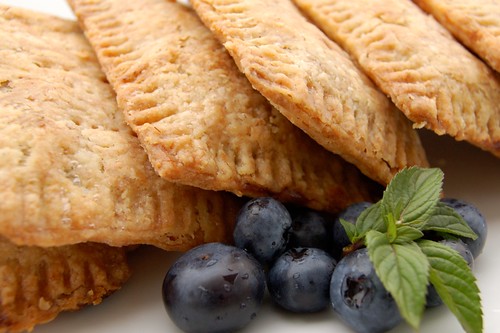
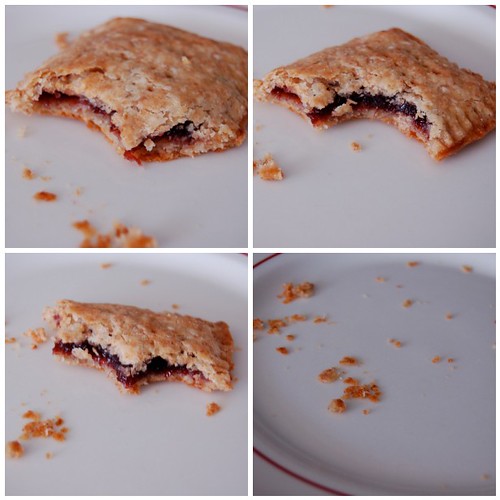
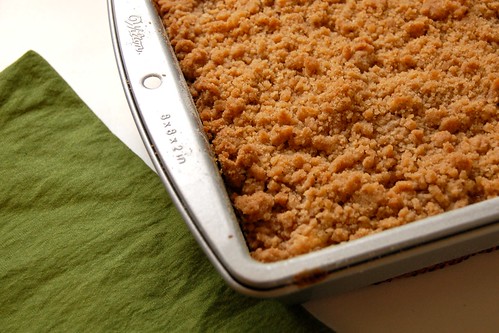
canning binge I had a lot of jam around again this time. The jam in these is blueberry lemon verbena, and it worked really well here, but any good quality jam will make an excellent filling. You could also use Nutella or cinnamon and sugar. Be prepared, however, for the fact that these don't actually taste much like pop tarts. They're not dry or cardboard-y, and hell, they're not even iced. But that's because it's essentially a small flat pie. Pie! For breakfast.

Chomp

Homemade Pop Tarts
adapted from King Arthur Flour
makes 9 pastries

I thought this crust was fairly easy to work with, the egg keeps it from being crumbly but it still bakes up flaky and tender. If you find yourself fighting to roll it out, make sure it's well floured, and either do it between sheets of parchment or stick it back in the fridge to firm up a bit before continuing.

For the crust:
1 1/2 cup all purpose flour
1/2 cup whole wheat flour
1 scant tablespoon sugar
1 teaspoon kosher salt
2 sticks (or one cup or 8 ounces) butter, cut into pieces
1 egg
2 tablespoons milk

For the filling:
3/4 cup good quality jam OR
nutella OR
1/2 cup brown sugar with 1/2 teaspoon cinnamon and 3 tablespoons flour, mixed together

You also need:
one egg, lightly beaten, to brush on the pastries before filling

First, make the dough. Whisk together the flours, sugar, and salt. Using your hands, or a pastry cutter, or a couple of forks, work the butter into the flour until pea-sized lumps of butter remain. The dough should hold together when you squeeze it. Mix the egg and milk together briefly, then mix them into the dough just until it comes together cohesively. Separate the dough into two pieces of even size (each should weigh ten ounces), and pat each piece into a 3"x5" rectangle, more or less. You can roll it out right from here or wrap each piece in plastic and refrigerate for a couple of days.

If you've chilled your dough, give it 15-20 minutes on the counter to take the chill off. Roll out on a floured surface to about 1/8" thickness, large enough that you can trim the edges and have a 9"x12" rectangle. Use a 9"x13" pan as a guide. Cut into nine rectangles of approximately 3"x4". Set aside, and roll and trim the second piece of dough the same way. Cut the second piece of dough into 9 rectangles as well.

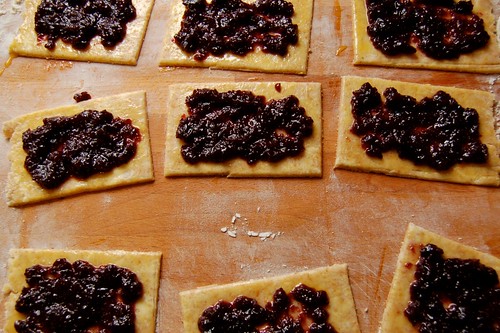
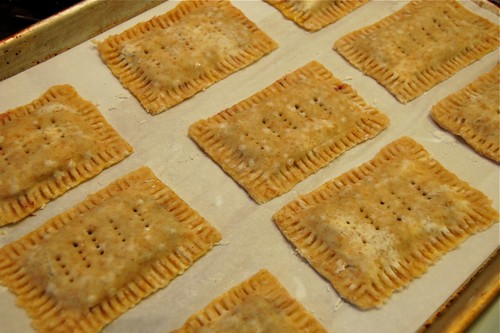
Brush the entire surface of each rectangle with the beaten egg. In the center of each rectangle, put a generous tablespoon of the filling and spread carefully, being sure to leave at least a 1/2 inch margin. Place an unfilled rectangle on top of each filled rectangle, pressing with your fingertips to seal around the edges of each pocket of jam. Be sure it is well sealed on all sides, and use a fork to re-seal and decorate each edge. Prick each pastry several times with a fork so steam can escape (see, it's just like pie!)

Place the tarts on a parchment lined baking sheet and refrigerate for half an hour. While the tarts chill, preheat the oven to 350. Bake for 25-35 minutes until light golden brown. Let them cool on the pan, if you can wait that long.

Sunday, September 12, 2010

Sunday Night Special: Canning

Canning 2010

I thought about calling this post "What I Did On My Summer Vacation," but I actually only had two weeks off. Ah, but no, I didn't amass this many jars of delicious things in just two weeks. If you don't count the meyer lemon marmalade I made in January (citrus season: the highlight of the colder months), I starting canning in earnest in May with pickled asparagus, which we'll eat with hardboiled eggs like before or maybe as part of an antipasto platter.

In June I kept the momentum going with dilly beans, which we have already eaten a jar of, with cheese and crackers during a night of card games. July was the month for jam: apricot, plum, and blueberry (we picked the blueberries ourselves and added lemon verbena from our garden). We've been eating the jam on toast, and as part of a delicious pastry that I have yet to tell you about, and I've got my eye on this jam tart recipe, too. We also made a kosher-style dill cucumber pickle in July, using a method from the new-this-year canning book Canning for a New Generation. I want to make every single thing in this book, but I'm running out of pantry space. Oh and if I run out of ways to use all this jam, here's a great list of ideas.

In August I made one more batch of jam (peach) and I made jalapeno jelly for the first time. It was also my first time using commercial pectin. My dad just emailed me to say he's enjoying the jar I sent up to Maine on crackers with goat cheese, so I'm going to call it a success. Speaking of spicy, we also put up sixteen pints of salsa in August.

September has been tomato month so far: 8 quarts of whole peeled tomatoes, 9 pints of crushed tomatoes, and three pints of tomato juice as a byproduct of the crushed tomatoes. We'll eat the tomatoes as sauce or on pizza or in any of the many, many things we eat that call for a can of tomatoes. I bet the tomato juice will show up as in a bloody mary for our New Year's Day brunch party if not before. Last week I made my first ever batch of mixed pickles using cauliflower, celery, carrots, pearl onions, cucumbers and hot and sweet peppers. We like these spicy pickles in salad or with cheese and crackers like the dilly beans.

I took this photo the other day mostly to remember what I've canned this year. I'll probably still do a batch of peach chutney since we enjoyed that so much last year, and I can always find room for more salsa in the cupboard. It was also fun to get it all out and see how productive we've been all season!  So, what have you put up this year? And how are you going to use it?

Friday, September 10, 2010

Stone Soup Farm CSA Week Fourteen (and squash ravioli)

Stone Soup Farm CSA Week Fourteen

This week's share is sort of cracking me up: watermelon and tomatoes = summer. Squash and cabbage = winter. It pretty much defines the in-between-season we're in at the moment. Tuesday it was 90 degrees. Yesterday it was barely 70. Either way, we're still eating well. Here's what we've got this week: another watermelon (ick), two acorn squash, two pounds of green zebra tomatoes (mature tomatoes that happen to be green, not green tomatoes), a pound and a half of beets, half a pound of edamame, a napa cabbage, a bunch of basil, and half a pound of mixed salad greens. My food processor died last week, mid-pesto, so I'm not sure what to do with the basil now. I've been making small batches and sticking them in the freezer, but I'll have to come up with another way to preserve this bunch. Oh and hey, did you know that you can keep basil fresh by cutting the bottom of the stems and sticking it in a glass of water just like you would for cut flowers? It does start to wilt after a few days, but it's better than the fridge!

251/365: Roasted Acorn Squash

My Aunt Helen (hi Aunt Helen!) gave us the pasta roller attachment for the Kitchenaid as a bridal shower gift a few weeks ago, and we broke it in this week when we used the acorn squash as ravioli filling. I don't say this lightly, guys, but it is life changing. Adam loves fresh pasta, and it's not that hard to make the dough: for every 100 grams of flour, one egg. Add a bit of salt, knead until smooth, rest, roll, cook. The only problem was that with our hand-cranked (read: Adam-cranked) pasta machine, it took us 45 minutes to roll out enough pasta for two people. Rolling out the dough with the Kitchenaid took ten minutes. Ten! I foresee lots of fresh pasta this winter.

Acorn Squash Ravioli

No actual recipe today, because I wasn't completely happy with way the filling turned out. I mixed the roasted acorn squash with some salt and a few plops of ricotta cheese, then we served the ravioli with a sage brown butter. It was tasty, but not as good as it could have been. Acorn squash was good (and our CSA farmer advised that we use the acorn squash sooner than later, it won't keep as well as last week's buttercup), but butternut would have been better since it has a smoother texture when cooked.

Tuesday, September 7, 2010

Peach Crumb Cake

Layers

Peaches, you are delicious. The only problem I have with you, peaches, is that people always want to talk about you the same way: as the summer fruit, eaten standing over the sink, juice dripping down arms, sticky faces. Which of course, peaches, is the best way to eat the first of you, early in August at the beginning of your harvest. But what about later?

Peach Crumb Cake

What about in early September, when my sticky-face, juicy-arm peach gorge is starting to feel a bit cliché? Well, peaches, that's when I start to think about how delicious you can be when cooked. Sometimes I grill you and plop a bit of ice cream down at your side. Simmered down into jam or tucked into a cake, your sweet tartness deepens and cools, rather like the turning season, and I realize yet again that you can be a fall fruit, too.  

230/365: Cake for breakfast

Peach Crumb Cake
Makes nine 2 1/2 inch square pieces
From Gourmet, August 1993


I found the crumb topping on this cake to be very thick. If you wanted to, you could cut it down to 3/4 the amounts listed and I bet you'd still get the same effect. This cake kept, covered, for a few days at room temperature, though the crumb topping is the crunchiest on the first day. I also know from experience that it is excellent for breakfast, so just take that into consideration when planning your next brunch, mmkay? 

First, make the topping:

1 cup AP flour
1/2 cup (packed) brown sugar
6 tablespoons unsalted butter (3/4 stick)
3/4 teaspoon cinnamon

Combine all ingredients and mash with a fork until well combined and crumbly. Set aside.

Then, make the cake:

1 stick softened unsalted butter
2/3 cup sugar
2 eggs
1 cup AP flour plus a couple of tablespoons for flouring the pan
3/4 teaspoon double acting baking powder
1/2 teaspoon salt
3-4 large peaches (about a pound and a half) peeled, pitted, and thinly sliced.

Preheat the oven to 350F. Butter an 8x8 inch cake pan, then add a couple tablespoons of flour and shake and tap it all around so the pan has a layer of flour clinging to the butter.

In a mixer or by hand, cream together the butter and sugar until light and fluffy, then add the eggs one at a time, beating well after each egg. Sift (or whisk) together the flour, baking powder and salt, and add them to the wet ingredients, beat just until combined. Spread the batter evenly in the pan.

Layer the sliced peaches evenly across the surface of the batter, then top with the crumb topping. Bake for 30 minutes, then turn the cake 180 degrees for even baking and bake another 20-30 minutes or until a tester comes out clean. Serve warm or at room temperature.

Friday, September 3, 2010

Stone Soup Farm CSA: Week Thirteen (and mystery squash)

CSA Week Thirteen

Happy long weekend, my friends! What are you going to do with your three days?

Here's what we're working with this week: basil, lettuce, cucumbers, tomatoes, potatoes, a small watermelon (shudder), and a mystery squash. Those tomatoes are in a jar now, in salsa. I also made some pesto with the basil and stuck it in the freezer. We'll eat the lettuce in salad or on sandwiches, cucumbers can go in a salad, too. The watermelon will sit in the fridge until Adam remembers it because I sure as heck am not going to eat something that tastes like compressed spiderwebs in syrup. Heck, no.

The only thing I can't figure out is what type of squash this is and what I should do with it. Suggestions anybody?

I've spent my week of unemployment so far canning a lot of things: jam, salsa, plain old tomatoes. My kitchen floor looks disgusting, just like last year.

241/365 Mystery Squash

Wednesday, September 1, 2010

Chili Garlic Hot Sauce

Hot Sauce

We go through hot sauce in this house like nobody's business. Adam is a spice fiend, and it's rubbed off on me to the point that I now have preferences from dish to dish. I'll eat a fried egg with a healthy dose of Frank's, a burrito with a splash of Tabasco, or a side of Adam's breakfast potatoes with a sprinkle of Cholula. Speaking of which, somebody remind me to tell you about Adam's breakfast potatoes at some point, because they are gooood.

233/365: Scotch Bonnet

A couple of Saturdays ago while Adam made potatoes to go with our eggs, I browsed my google reader and came across Melissa Clark's Good Appetite column on homemade hot sauces. I loved the idea of a chili garlic sauce sweetened with sweet peppers instead of sugar, and we had a heap of sweet red peppers coming ripe in the garden. Plus, habaneros are crazy cheap, like a quarter a piece, so this huge jar of sriracha-like sauce cost us a buck plus pantry ingredients. And hey, it was fun!

Carmen

Chili Garlic Hot Sauce
adapted from Melissa Clark in the New York Times


I know everyone is always saying you should wear plastic gloves when chopping hot peppers. For milder chiles like jalapenos, I don't usually do so (oooh, living on the edge!). In fact, I don't even have plastic gloves. But when chopping four habaneros, I thought it was good advice, and I improvised by sticking sandwich baggies on my hands before I got started. A little goofy looking, but it worked. Oh, and try not to breath in chili-vinegar fumes, that stuff will sting your sinuses like no other.

4 hot chili peppers, preferably habanero
3/4 pound sweet red peppers (2-3 red bell peppers or similar)
3 huge or five regular garlic cloves
3/4 cup white vinegar
1/2 teaspoon kosher salt


Roughly chop the chilis (wear gloves or baggies, please!), sweet peppers and garlic. Combine in a medium pot with the vinegar and salt, and bring to a simmer over medium heat. Simmer for about 10 minutes or until peppers are tender. Transfer carefully to a blender, or use an immersion blender, and blend the sauce until you have a mostly smooth puree. Pour into a jar (I got a little more than a pint) and stick it in the fridge. 


The original recipe says to wait three days before eating, but we ate some the night I made it and loved it.


Makes about 2 cups (one pint, though I got a tiny bit more than that), and should keep in the fridge for at least a month.

Chile Garlic Sauce

Plus, look how awesome my timing is: September first is sweet and hot peppers day and the first week of Fall Fest 2010! Did you play this week?

Tuesday, August 31, 2010

Sage Ice Cream

Sage Ice Cream, Grilled Peaches

People, it is hot. I know it's not considered good form to mention the weather in every blog post ever, but if the weather doesn't dictate what I want to eat, then I don't know what does. Maybe if I call it "micro-seasonal eating" or something?

Anyway, last week we had a couple days of rain which was oddly delightful after the very warm, blue skies, humid breeze end of July. The garden loved the water: the monster zucchini is climbing out of the pot, our cherry tomatoes have put forth a second round crop, the lemon verbena is up to my waist, and the rest of the herbs are very, very happy.

232/365: Sage

Back in June, still giddy from the first real month of garden fresh herbs, Adam asked me how I planned to use the bounty we had planted. Well, obviously basil gets whizzed into pesto, and Kalyn taught me to freeze thyme and rosemary. I used the lemon verbena in blueberry jam that we'll eat all year, and the bay can winter over on the enclosed front porch, but what about the sage? It freezes ok, and I'll probably freeze whatever's left toward the end of the season, but I had a hunch that sage would make a really interesting ice cream. When I searched for a recipe, the one that kept popping up was this one from a 2001 issue of Gourmet (moment of silence). However. Nine egg yolks? Psssh. Clearly not necessary. And I don't want to overload my ice cream maker, I know it can handle about 3 cups of liquid in the base, but not much more. So I tweaked and I fiddled and I came up with the recipe below. It went great with rhubarb pie (sans strawberry) back in June, and it was an excellent dessert accompaniment to the peaches we threw on the still-hot grill after we ate kabobs for dinner.

Peaches and Sage Ice Cream

Sage Ice Cream
adapted from Gourmet, October 2001
Makes about a quart

You can use just about any combination of dairy you like, as long as you get three cups total. The first time I made this I used two cups of heavy cream and a cup of whole milk. This time I used one and a half cups of each. You could get away with two cups of cream and a cup of 1% or 2% if you want, but don't wuss out and use skim milk, ok? Or if you do, don't blame me when your dessert is icy and wan. Fat is flavor, friends.

2 cups heavy cream
1 cup whole milk
1/3 - 1/2 cup fresh sage leaves, roughly chopped
3 strips lemon zest, 2 inches long
6 egg yolks
scant 3/4 cup sugar
1/4 teaspoon salt

Heat the cream, milk, sage and zest in a medium sauce pot just until it boils. Turn off the heat and allow to steep for half an hour.

Whisk together the egg yolks, sugar and salt. Temper the eggs: slowly add a cup of the hot cream mixture to the eggs so they warm slowly and do not curdle, then add the egg mixture back to the pot of cream, whisking constantly. Cook over low heat, stirring constantly, until it coats the back of a spoon. (By which I mean, if you run your finger over the back of the spoon, the trail it creates stays put and is not immediately overrun with cream again).

Strain the custard through a sieve into a bowl, then press a layer of plastic wrap right onto the surface and chill for at least three hours or overnight. Churn in an ice cream machine, then freeze in an airtight container until ready to use.

Friday, August 27, 2010

Stone Soup Farm CSA: Week Twelve

236/365: Stone Soup Farm CSA Week Twelve

Whew, you guys, what a week! I know I'm several days late with the CSA post but it was my last week at work so I was there rather late most evenings. I'm all done now, and getting ready for my next adventure. Thank you all so, so much for your support and encouragement! My week off starts with Adam's (30th!) birthday party tomorrow, so I've spent most of today cooking and shopping to prepare for it; I've got a brisket in the oven and another one in the slow cooker. I know this is a crazy amount of meat, but Adam's a popular dude and dangit, I'm going to want leftovers, so I'm cooking a lot of meat. In other news, my house currently smells AWESOME.

This week's veggies are: tomatoes, corn, cucumbers, pattypan squash, basil, lettuce, swiss chard, onions, garlic, edamame and some carrots that I think sat in the ground a bit too long because they were really quite woody, unfortunately.

I made classic basil pesto with, um, the basil and put it on a pizza with sliced tomato.

237/365: Pizza

Alright, I know, a little slapdash and rushed, but fear not! I'll be back soon with hot sauce, breakfast pastries, ice cream, and cake! Have a great weekend, everyone!

PS: Michael Ruhlman is doing a Week Twelve Roundup over on his blog - interesting stuff!

Monday, August 23, 2010

I've been holding back.

Grilled Cheese

Dear friends,

I've been lying to you. Not an outright lie (don't worry, my name really is Bruno), but a sin of omission, as the expression goes. I was discussing it with a friend at lunch on Friday and I confessed, "Well, I haven't told the internet yet." She pointed out that I was being very silly and weird (I believe she called me a freakshow, but in a totally loving way), and I agreed. So here it goes, internet:

I quit my job; my last day is this Thursday. I start the professional chef's program at the Cambridge School of Culinary Arts in September.

I got fitted for my uniform and picked up my knife roll and supplies on Wednesday and I've got a week off in between work and school. I'm still not entirely sure what I'll be doing that week, but I figured it's going to be a while before I can just take a week off. School is only 3 days a week, so I'll be looking for a part time job in the field. As for the plan post-education, well, one of the biggest reasons for going to school is to narrow down the options. I hadn't told you yet because I feel like I'm supposed to have a firmer plan.

So there you go, internet, that's my news. Now who wants a grilled cheese?

Grilled Cheese with Tomato and Pesto
You probably don't need a recipe for grilled cheese, but I'm giving you one anyway. It's a great way to use that parsley pesto

two pieces of whole grain bread
cheddar cheese, sliced
two fat slices of tomato
a blob of parsley pesto (or basil pesto)
butter

Butter one side each of two pieces of bread. Heat a skillet over medium heat, and put one piece of bread in the skillet, butter side down. Lay the cheese slices on the bread, then put the tomato slices on the cheese. Spread the pesto on the unbuttered side of the other piece of bread, then put that on top, pesto side on the tomatoes. As the cheese melts, carefully turn the sandwich over, toasting both sides equally. When the cheese is melted and the tomato is heated through, your sandwich is done.

Thursday, August 19, 2010

Stone Soup Farm CSA: Week Eleven (and Gazpacho!)

Stone Soup Farm CSA Week Eleven

People keep talking about how summer is winding down, and folks, I'm not having any of it. Nope. Nosiree, not interested. Do not talk to me about back to school sales or beef stew or halloween, because I am not ready for summer to end. I mean, look at that pile of vegetables. Does that say "end of season" to you? We got: a bunch of huge scallions, six tomatoes, two pattypan squashes, spinach, basil, cucumbers, potatoes and some really gorgeous string beans in purple and yellow.

I'm not sure what possessed me to make gazpacho with this haul. I first had gazpacho in the eighth grade when I was intrigued by the name - say it with me. gazzzzPacho! throaty G, smooth Z, explosive P, and a nice long ooooo at the end -  However, I was at some chain restaurant (maybe Chili's?) when I ordered it and when I tasted it all I could think was ugh, runny salsa... and they're passing this off as soup? I spent the next fifteen years saying I didn't like cold soup.

Dudes, I was wrong. I do like cold soup. This is just exactly the ticket for those insanely humid days when just picking up a knife is enough to make you break a sweat, because even though it involves a fair bit of chopping, you let the blender do all the hard work.

229/365: Gazpacho
 
Simple, Straightforward Gazpacho
serves 2-4

Because you blend the whole thing up till smooth, there's no need to peel the tomatoes, but you do want to peel the cucumbers because the skins can be waxy. You can use any kind of tomato you like, here. I used two CSA tomatoes, plus a few romas from our container garden. Imperfect tomatoes can be used in gazpacho, too, because there's no need for lovely presentation of whole slices, you just chop, blend, and chill. Easy and delicious! Oh, and if you want this soup to be vegetarian or vegan, skip the worcestershire sauce (it has anchovies) or use soy sauce instead. 

1 1/2 lbs tomatoes, roughly chopped
1 jalapeno, seeded, minced
1 huge or 2 regular cloves garlic, finely chopped or passed through a press
scant half an onion, roughly chopped
2 small cucumbers, peeled, roughly chopped
1 tbsp red wine vinegar
1 1/2 tsp worcestershire sauce
2 tablespoons olive oil, plus more for garnish
2 tablespoons chopped parsley, plus more for garnish
salt and pepper
1/2 an avocado, cubed, for garnish (optional)

Combine the tomatoes, jalapeno, garlic, onion, cucumbers, vinegar, worcestershire sauce (or soy sauce), parsley, olive oil, 3/4 teaspoon salt and several grinds of black pepper in a blender or food processor, or in a pot if using an immersion blender (that's what I did). Blend to desired consistency (but don't leave it too chunky or you'll end up with the cold runny salsa thing). Chill for at least an hour or up to overnight. Ladle into bowls, garnish with avocado if you like, drizzle with a little more olive oil, and serve. Garlicky toasted baguette makes a nice accompaniment.

Monday, August 16, 2010

Parsley and Pepita Pesto

Parsley Pepita Pesto
 
Did you know that the word pesto in Italian doesn't always mean basil garlic sauce? I mean, sure, sometimes it does, but pesto in its simplest sense just means stomped, crushed, smashed to oblivion. The name of the sauce comes from the act of making it in a mortar and pestle, smashing the garlic and pine nuts into a paste with salt, then grinding in the basil and olive oil (and sometimes cheese, but not always). But just because that's how the sauce gets its name doesn't mean that's how you have to make it; these days the food processor is the way to go.
 
You also don't have to make pesto with just basil. That one up there on top of al dente green beans is made with parsley, pepitas (pumkin seeds), garlic, olive oil, and parmesan cheese. We ate it on top of those green beans last week, and this weekend we swirled it into some omelettes on a lazy Saturday morning. Tonight, I'm thinking potatoes with parsley and pepita pesto, and not just for the alliteration. I like the rounder, subtler taste of the parsley compared to basil, and the pepitas give it an interesting note of earthiness.
 
Oh hey look, other people make pesto out of things that aren't basil!
Arugula Pesto at Simply Recipes
Spinach and Basil Pesto at Kalyn's Kitchen
Korean Perilla Pesto at Muffin Top
Radish Green and Hazelnut Pesto at Delicious Days
Asparagus Pesto, right here, from a couple months ago
 
Parsley Pepita Pesto
You only need the leaves of the parsley here, but stick the stems in your freezer - next time you make chicken or vegetable stock, add them to the pot.
 
makes about a cup of pesto
 
1 bunch parsley, leaves only 
2 handfuls pepitas (about 2/3 cup)
2-3 cloves garlic, peeled
1/2 cup grated parmesan cheese
olive oil (I started with 1/2 a cup)
salt (I started with 1 teaspoon)
lemon juice (optional - I started with about half a tablespoon)
 
Briefly toast the pepitas in a dry pan over medium heat until they are just starting to take on color. Put the pepitas and garlic in the food processor and pulse a few times to chop them up. I like to do this before I add the herbs so I don't come across any huge chunks in the finished product.
 
Scrape down the sides of the bowl, then add the parsley, cheese, and about a teaspoon of salt, then set the processor running on low. Add the oil in a slow stream through the tube while the processor is running. I started with half a cup but ended up adding a little more; how much you use depends on how big your bunch of parsley was. You may need to stop and scrape down the sides of the bowl and continue processing.
 
When the pesto has reached a consistency you like, shut off the machine and taste the sauce. If you think it needs it, add the lemon juice, and maybe more salt, then pulse the processor a few times to thoroughly mix. Taste again and adjust accordingly.
 
Serve on vegetables, potatoes, pasta, fish, etc.


Thursday, August 12, 2010

Stone Soup Farm CSA: Week Ten (and baked tomato sauce)

Stone Soup Farm CSA Week 10

I know. I know. Those tomatoes! They're distracting me, too. Well, they would if they were still around. Before I wax rhapsodic, let me run down the inventory this week: beets with their greens (which are really purple), two yellow zucchini, two small pattypan squashes, a bunch of basil, a pound of carrots, two gorgeous onions and a head of red leaf lettuce. On Tuesday (vegetable day! the best day of the week!) we had a salad with the lettuce and a couple of tomatoes (plus an astonishing array of things I found in the fridge).

Wednesday I used the two remaining tomatoes in a riff on this baked pasta sauce from The Wednesday Chef. I chopped up the tomatoes into large chunks, spread them with some olive oil in a baking dish, and sprinkled a generous handful of breadcrumbs on top. (I had to use store bought panko, my freezer stash of crumbs was burned beyond recognition). I forgot the cheese, which it turns out was an error on my part. After 20 minutes at 400, I stirred the smushy melty awesomeness into a sauce, added a handful of basil and a modest shower of parmesan cheese and tossed it with some campanelle pasta. Adam's comment? "Need's more parm." He was totally right. I remember thinking that I didn't want to salt them too aggressively before they went in the oven because they'd be concentrating in flavor a bit and I knew I would be adding parmesan with the pasta. I was afraid of over salting, and instead wasn't aggressive enough. Lesson learned: don't be bashful!

Baked Tomato Pasta Sauce

I did love the texture of this sauce, however. I know it's cucina povera, but using bread crumbs with tomatoes is inspired and to me it feels decadent to use purposely sogged bread. I could be a total weirdo, but hey, maybe you'll like it, too!

What interesting things have you done with tomatoes this summer? And aren't you glad they're back with such vigor after last year's blight?

Wednesday, August 4, 2010

Stone Soup Farm CSA: Week Nine (and Greek Salad)

CSA Week 9

Week nine is awesome, guys, and primed for chunky salad making. We got: two ears of corn, two cucumbers, four tomatoes, three peppers, a pound and a half of potatoes, a bunch of parsley and a bunch of chard. That first night we turned two of the tomatoes and the cucumbers into a greek salad. First, I sliced half a sweet red onion and tossed it with a couple capfuls of red wine vinegar. I let that sit for about twenty minutes to mellow out the bite of the onion and I chopped the rest of the vegetables.

Greek Salad

I like my cucumbers peeled and seeded before I chop them, so that's what I did. I cut up two CSA tomatoes into chunks and added a handful of the Sun Gold cherry tomatoes from our back patio garden. I added a handful of pitted Kalamata olives and tossed those with the chopped vegetables with the onions (I drained off some of the excess vinegar) and then topped it with a little slab of sheep's milk feta, which made a nice bed for the patio garden oregano and freshly ground black pepper sprinkled on top. The finishing touch was a drizzle of good olive oil and a piece of bread for scooping up cheesy bits of tomato.

Caprese

Ah, and speaking of cheese and tomatoes: we used the other two tomatoes for insalata caprese tonight with home grown basil and Fiore di Nonno mozzarella. I think I'm in love with summer.