Showing posts with label baking. Show all posts

Saturday, November 3, 2012

Chocolate Chip Coconut Oatmeal Muffins

DSC_0005

Hurricane Sandy was, for us, a non-event, for which I am incredibly thankful. School was closed so I didn't have to go to work and Adam went in for a few hours but was home by 11:30, as the T stopped running in the early afternoon. I had anticipated our power going out mid morning, so I got up and showered as usual and then cleaned the whole house (including folding and putting away four loads of laundry!) and then everything on my list was done. By 9:30 in the morning. By 11 I was certain the power would be out any minute, but I wanted chocolate chip muffins (Perhaps I saw someone eating one on TV or something? Who knows where these whims come from). So I set to baking. The batter for these was done in less than ten minutes and they were out of the oven 15 minutes after that. Awesome.

Mini Chocolate Chip Coconut Oatmeal Muffins
adapted from an old Gourmet recipe
makes 18-20 mini muffins

This is a dessert muffin for sure, but since it doesn't have frosting (and therefore isn't a cupcake) it's totally ok to eat it for breakfast. I used coconut instead of walnuts because I felt like it, and I only had sweetened coconut so these are not a subtly sweet muffin, and they are incredibly moist. You could bake in traditional size muffin tins and then you'd get six instead of 18 and they'd be longer in the oven.

1 cup all purpose flour
1/4 cup sugar
1 tsp baking powder
1/2 tsp kosher salt
1 egg
1/4 cup unsalted butter, melted and cooled slightly (1/2 a stick)
1/4 cup whole milk
1/3 cup rolled oats, toasted slightly
1/3 cup shredded coconut
1/2 cup semisweet chocolate chips

Preheat the oven to 400F.

Whisk together the flour, sugar, baking powder and salt in a medium bowl. In a small bowl combine the egg, milk and butter. Pour the liquid stuff into the dry and mix until it's almost combined, add the oats, coconut and chocolate chips in and mix just until there's no dry stuff showing.

Line a mini muffin tin (or two) with paper liners. Use a tablespoon to fill each tin with batter just to the top, about a tablespoon for each. If you're using disposable mini muffin tins, put them on a cookie sheet for ease of transfer and stick them in the oven. Bake for ten minutes, rotate the pan and bake for 2-5 minutes more, until a toothpick inserted in the muffin comes out clean.

Remove muffins from pan and cook on a wire rack. Serve warm or at room temp. Mini muffins keep in an airtight container at room temperature, for 5 days.

Wednesday, October 12, 2011

Peter Reinhart's Light Wheat Bread

light wheat bread

You know what I love about fall? It's not too hot to bake a loaf of bread. I mean, I like the pretty leaves and I like sweaters and boots, but is there anything better than the smell of bread baking? The loaf you see here is the one I've been baking every week or two for the better part of a year.

harvest grains

The recipe is from Peter Reinhart's book The Bread Baker's Apprentice, which is tied with Vegetarian Cooking for Everyone with my number one favorite cook book. It's a mix of white and wheat flours, and I like to add half a cup of this grain-and-seed blend from King Arthur just to up the hippie factor. The resulting bread is flavorful from the whole wheat flour but not overhwelmingly nutty, so it stands up brilliantly to a variety of sandwich fillings.

kneaded

It's also a dough that is really pleasant to work with. If you've never made a loaf of bread before but you're looking for a place to start, give this one a try. The dough comes together easily and it bakes up with a nice tight crumb.

making bread

And let's be honest, we all know the ultimate test of a bread is how well it toasts. Voila:

breakfast

Peter Reinhart's Light Wheat Bread

Dudes, if you're baking regularly (or if you wish you were), get on the bandwagon and get a scale. I've been using this one for 3 years, and it makes everything so much easier. Just start pouring flour in the bowl and hit the tare button before you add the next ingredient. Who needs mulitple measuring devices? I dirty exactly one spoon for this whole recipe.

11.25 ounces (2 1/2 cups) bread flour (you could use all purpose, too)
6.75 ounces (1 1/2 cups) whole wheat flour
.75 ounces ( 1 1/2 Tbsp) sugar (or honey, added with the water instead)
.38 ounces (1 3/4 tsp) kosher salt
1 ounce (3 Tbsp) powdered milk
.17 ounce (1 1/2 tsp) instant yeast*
1 ounce (2 Tbsp) shortening (or butter), room temperature
10 ounces (1 1/4 cups) water, warm (slightly warmer than body temp, 100-110F is perfect)
spray oil (I use Pam)

Mix together the flours, sugar, salt, powdered milk and instant yeast in a large bowl. Add the shortening and stir to mix it in a bit. Add the water and stir until the ingredients clump together in a ball. Then dump the whole mess out on a lightly floured counter and begin to knead. It should take about ten minutes of fairly vigorous kneading to get it to where you want it, which is smooth and cohesive, maybe a little tacky but certainly not sticky. You can add a bit of flour as you knead if the dough is sticking.

You can also do this in a mixer, just measure the ingredients into the mixer bowl and attach the dough hook, then turn the mixer on low and add the water in a slow stream, it should come together in a ball, then you can turn up the speed to medium and knead in the machine for 6 minutes or so.

With either method, when the dough is ready it will spring back if you poke it with your finger.

Now wipe any crumbs out of the mixing bowl (no need to wash it) and mist it with spray oil. Shape the dough into a ball and put it in the bowl, rolling it around to coat it with oil. Cover the bowl with plastic wrap and leave it alone for an hour or until it doubles in size. When it's doubled, it will feel pillowy and soft if you touch it gently.

Once the dough has doubled, spray the counter with oil and dump the dough out onto it. Press it into a rectangle about 6 by 10 inches, it will deflate as you press it. Starting at a short end, roll the rectangle into a log, pressing each seam tight with your fingers as you go. When you have a loaf shaped log, pinch the seam closed and roll it on the counter top to smooth it out. Spray a loaf pan with oil and put the loaf in, seamed side down. I usually squish it down a bit, trying to even it out some. Cover it gently with plastic wrap.

Preheat the oven to 350F.

Let the loaf rise until it just crests the lip of the pan. When it has risen, Use a serrated knife to slash down the center of the loaf about 1/4" deep. Put the loaf in the oven. After 30 minutes, rotate it for even baking and bake another 15-20 minutes. The loaf is done when it's evenly golden brown all over and sounds hollow if you tap it. If you take the temperature of the finished loaf, it should read between 190F and 200F. Make sure you let the bread cool for at least an hour before you slice it, toast it, and enjoy it with some delicious fried eggs.


*Instant yeast is a lot like active dry yeast but it doesn't need to be proofed or allowed to bloom in warm water first and I prefer it because it's easier to use. If you only have active dry yeast, just use the same amount and let it get foamy in the water first.


Tuesday, February 23, 2010

Black Pepper Brioche Burger Buns


After our self-imposed vegetarian stint last month, I'm finding that I don't actually even want to eat meat all that often. In fact, while we have recently ordered meat dishes in restaurants, we haven't prepared it at home in... I don't know how long. I actually can't think of the last time we- oh wait, we made that chicken braised in milk like a month ago. Man, that was good. But I digress!

So last week when the craving for burgers hit me like a sack of iron deficiency, I knew it was time to break the meat drought (er, apologies for that somewhat icky metaphor). Conveniently, my friend Evan, a fellow home-cooking enthusiast* wanted to get together to cook and eat and generally make merry that Saturday night. I wasted no time in informing him we would be having burgers. In retrospect, perhaps it would have been more polite to ask what he wanted, but he seemed enthusiastic and told me he would pick up some ground beef and fixings.

Here's where it gets food bloggy: I offered to bring home-made buns. I know, I know, the bread's not really the point of a burger, but a couple of weeks ago Adam had enjoyed a burger at Lord Hobo in Cambridge, which they served on black pepper challah buns. Actually, 6 of the 8 people in our party ordered the burger (I did not) and when they were brought to the table the floral notes of black pepper were almost overhwelming, and I was instantly filled with orderers remorse. I wanted a black pepper bun!

You guys, this is the black pepper bun I wanted. They smelled like the buns in my mind, and were flavorful without being overtly peppery. And the burgers were exactly what I had been craving, juicy and meaty, all snug and cozy in their bready pillows. If you want to take your family's burger night or your neighbor's backyard cook-out up to the next level, you should really give these bad boys a try.

*Let's see if we can eradicate "foodie" once and for all, eh? I offer this up as a more accurate if slightly more cumbersome substitute.

Black Pepper Brioche Burger Buns
I used 3 teaspoons of black pepper, but I dare say you could use more. Or hey, go crazy, grind up one of those mixes of three colors of peppercorns and take the floral notes as far as you can! This is adapted from the Comme Ça burger buns recipe from the New York Times this past summer.

3 tablespoons whole milk, at room temperature
2 teaspoons active dry yeast
2 1/2 tablespoons sugar
3-4 teaspoons freshly ground black pepper
2 large eggs
2 cups bread flour
1 1/3 cup all-purpose flour
1 1/2 teaspoons salt
3 tablespoons unsalted butter, softened
sesame seeds (optional)
 
Combine 1 cup warm water, the milk, yeast and sugar in a small bowl. Stir then let stand until foamy
 
In another small bowl, beat one egg.

In a large bowl, whisk together the flours, then rub the butter in with your fingers until the mixture looks like crumbs or meal. Stir in yeast mixture and beaten egg; you will probably need a dough scraper.

Scrape the dough out onto the counter (don't flour it, just be prepared to use your dough scraper a lot). Instead of traditional kneading, you'll want to pick the dough up and slap it down, using some of the fold and push motion you'd normally use but trying to do it in the air. Do this weird pick up and slap knead thing for 8-10 minutes until it's smooth and elastic. It may be a little tacky. (The reason you don't flour the counter is that the more flour you work into the dough the tougher the buns will be. Sometimes sturdy bread is awesome, but we're going for soft and pillowy here.)
Shape the dough into a ball and return it to the (cleaned, lightly oiled) bowl. Cover and let rise until doubled in bulk, 1-2 hours.

Line a baking sheet with parchment paper or a silpat. Divide the dough into 8 equal parts (eyeball a half, then cut each half in half, and then again). Gently roll each piece into a ball and lay them out 2-3 inches apart on a baking sheet. Cover with a clean towel or the plastic wrap you used to cover the bowl, and let rise again for another hour or two.

Fifteen to twenty minutes before you want to bake, (say, after the buns have been resting for an hour or so), put a large shallow pan of water on the oven floor (or bottom rack). Preheat the oven to 400 degrees. After 15-20 minutes, beat the remaining egg with one tablespoon of water and brush the egg wash over the tops of the buns, then sprinkle with sesame seeds, if using. Bake for 15 minutes, turning the sheet halfway through, or until the tops are golden brown and toasty. Remove buns to cooling rack to cool completely before slicing and stuffing with burgery deliciousness.

Thursday, November 5, 2009

Leftovers Pizza


Do you eat your leftovers as leftovers? Sometimes we do that here, especially if dinner transports or reheats easily for lunch the next day. Sometimes, though, you get stuck with bits and bobs and pieces of things that might not make sense alone, plain, reheated. When that happens, it's nice to turn them into something else. Tonight we took some leftover mashed sweet potatoes and fried them into loose patties with leftover braised leeks. They were structurally unsound, but tasty and here's the kicker: it wasn't exactly the same thing we ate yesterday.

One of my favorite ways to jazz up leftovers is to throw them on a pizza crust. The opening photo features leftover roasted root vegetables that had gone with a chicken, and some leftover Acorn Squash with Chili Lime Vinaigrette. I mashed up some goat cheese with some leftover vinaigrette, plopped it on the crust, topped with the chopped vegetables, and voila! Pizza! Drizzled with a little olive oil it and alongside a glass of wine it made a mighty fine dinner, and I felt awfully thrifty.

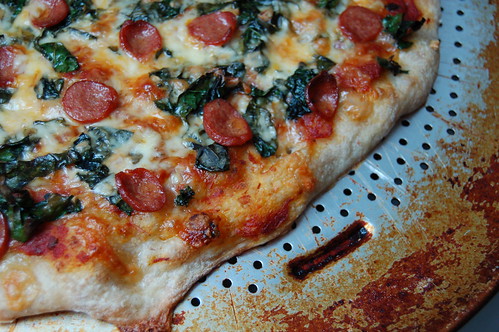
Occasionally you may find yourself with a seemingly bizarre mix of flavors, but you just have to pretend you run a fancy artisan pizza place and trust your instincts that weird combinations will in fact be delicious. Take this leftovers pizza from earlier this week: tomato sauce, extra from some pasta. emmental cheese, some sauteed kale that was just hanging out in the fridge. A little pepper jack for good measure. And one sliced hot dog, because there was only one, we were out of buns, and why not? It's been tasty before. When this came out of the oven, we ate it with mustard and sauerkraut. Heck yes we did.


What's the weirdest leftovers pizza you've ever made?

Speaking of leftovers - for a brilliant treatise on the subject of leftovers, you should check out this post on Simmer Till Done that includes many uses for the onions from that giant batch of french onion soup you just made.

Whole Wheat Pizza Dough
adapted from Deborah Madison
The key to leftovers pizza (which then becomes leftover leftovers pizza the next morning... heh) is having a reliable crust. I find this one an absolute dream to work with; I use 1 cup of whole wheat flour and 3 cups of all purpose, but you can use as little as 1/2 cup of whole wheat flour in this dough, just increase the AP flour to 3 1/2 cups. Just make sure the total you use is 4 cups of flour. This dough also keeps well in the freezer for about a month, just make sure to take it out the day before you want to use it and let it thaw in the fridge.

1 1/2 cup warm water
2 tsp yeast,
2 tbsp olive oil
1 1/2 tsp salt
1/2 cup to 1 cup whole wheat flour
3 cups to 3 1/2 cups all purpose flour

In a large bowl, add the yeast to the warm water. Allow to sit for ten minutes; if the yeast begins to foam, continue - if it hasn't started to foam after 10 minutes start over with new yeast.

Add the salt, olive oil and whole wheat flour, and start mixing, then add the white flour. Mix until a shaggy dough forms. Turn out onto a lightly floured countertop and knead until smooth (5-10 minutes, generally). You may need to add additional flour to the counter to keep it from sticking.

Coat the original bowl with a little bit of olive oil, then add the ball of dough. Turn the dough to coat it with oil so the surface has enough moisture to expand during rising. Cover with a clean towel and allow to rise until doubled, 40-60 minutes.

Divide the dough in two, shape each piece into a ball, then put the pieces on the counter and cover with a towel. Let rest for another 20-30 minutes. At this point, I put one of the balls of dough into a quart size freezer bag and stash it in the freezer for use later on. Or you could just make two pizzas...

While the dough is resting, start pre-heating your oven and pizza stone (or another upside down cookie sheet) to the highest temperature possible, mine goes to 500 but yours may only go as high as 450. Either way, crank it up. A super hot oven is crucial to good pizza at home.

Take the ball of dough and begin shaping it into a circle on a floured counter or pizza peel (back of a cookie sheet also works). You should be able to get about a 14 inch circle of about 1/4 inch thickness. Cover again with a towel and let it rest for 5-10 minutes.

Add the leftovers of your choice (don't be overzealous, too much sauce/cheese can overwhelm a dough, leaving it soggy), and slide the pizza off the peel/cookie sheet onto the stone/cookie sheet. Bake for 8-15 minutes. I start checking mine at 8 - really thin crusts cook very quickly - but if your crust is thick or you used a lot of toppings it may take up to 15 minutes to properly brown.

Remove from the oven (careful, it's VERY hot) and allow to cook for a couple of minutes before slicing so the cheese has a chance to set back up again. Unless you didn't use cheese (hey, it could happen) in which case, dig in!

Sunday, October 18, 2009

Apple Spice Cake


It's not unusual for October to be rainy here in Boston, and the forecast called for it, so when I left the house in the morning, I was wearing rain boots, a rain coat, and carrying an umbrella... but then I noticed the drops weren't drops. They were FLAKES. And then today it snowed again, but this time the flakes were the big downy chunks of snow that make me think of instant mashed potatoes. Nature is so cruel!

The only solace I am taking in the fact that we're getting SNOW in OCTOBER is that I have an excuse to bake cake. Well, the snow, and the seven apples, leftover from a picking trip weeks ago, taunting me from the fruit bowl. And the buttermilk going bad in the fridge.* Ok, three excuses to bake.


Apple Spice Cake
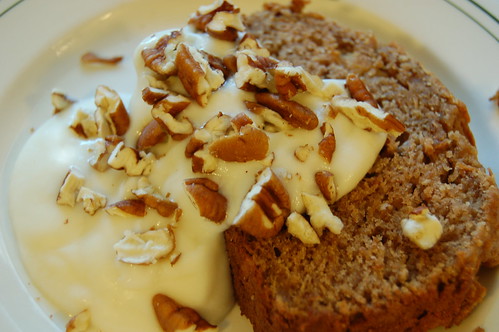
I adapted this from a recipe on The Perfect Pantry, based on the spices I like with apples and what I had in the house. It is excellent with ice cream for dessert, but I find it most suited for breakfast, toasted, with a dollop of yogurt and a sprinkling of pecans. I doubled this because I had so many apples and so much buttermilk to use; I brought the extra loaf to work and it was gone in minutes!

2 cups all-purpose unbleached flour
1/4 cup whole wheat flour
1 tsp baking soda
1 tsp salt
1/2 tsp nutmeg
1 tsp cinnamon
1/4 tsp ginger
1/2 cup vegetable shortening
3/4 cup brown sugar
2 eggs
1 tsp pure vanilla extract
1 1/4 cup tart apples, grated (3-4 large apples- I used a mix of Gala, Braeburn, and Macoun, but you can use whatever you have.)
1/2 cup buttermilk

Preheat oven to 350. Lightly grease a loaf pan with butter or baking spray.

Combine flours and spices in a medium bowl, whisk to combine (I like to whisk in the bowl rather than sift, but I guess that might be cheating, so if you want, you can sift them together instead).

In another bowl, cream the shortening and brown sugar until fluffy. Add the vanilla and eggs to the sugar and shortening, and stir to combine well.

Add 1/3 the flour dry ingredients to the sugar mixture, stir to combine. Then add 1/2 the buttermilk and half the apples, stir to combine. Then add another third of the dry ingredients, then the rest of the buttermilk and apples, then the dry ingredients, stirring to combine after each addition.

Scoop the batter into the greased loaf pan, smooth the top a little, and bake for an hour, rotating once. Let the loaf cool in the pan for 10 minutes, then turn it out onto a wire rack to cool completely.

*Do you always have leftover buttermilk from pancakes or ranch dressing (or apple spice cake)? Sarah at the Pink of Perfection has created THE ULTIMATE BUTTERMILK RECIPE REPOSITORY and I am so excited about it that I have to use capital letters. Go check it out.

Friday, July 10, 2009

Currant Cakes (plus a winner and MORE books!)


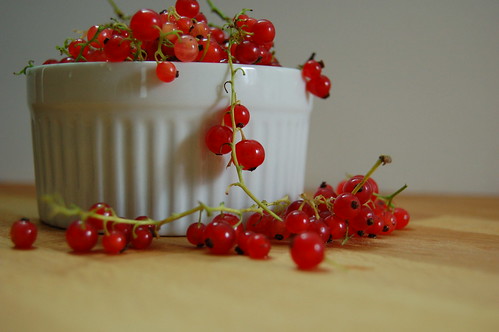
I went up to the market at Government Center on Wednesday around noon, looking for sour cherries. I had plans to start a liqueur. I found myself at the booth for Silverbrook Farms from Dartmouth, where I was drawn in by some lovely (purple!) spring onions. The farmer had some raspberries, but no cherries, so as I handed over my cash for the onions, I asked if he knew whether anyone at the market with cherries. He pointed me in the direction of the Keown Orchard booth (they did have cherries!), but then he asked if I would like to try the currants. I put a tiny red berry in my mouth and it exploded in a burst of tart, vaguely citrusy pink juice that actually made me say aloud "Whoa!" After a discussion of what they could be used for (muddled into drinks, reduced into syrup or jam, baked goods). I handed the man $3 and went on my merry way with a small carton of currants.

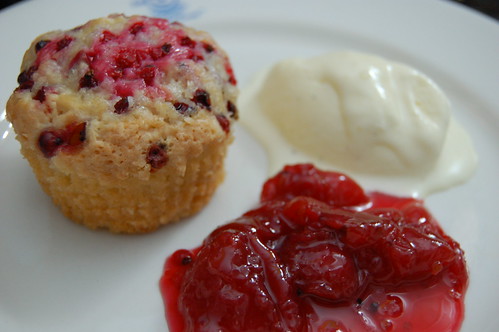
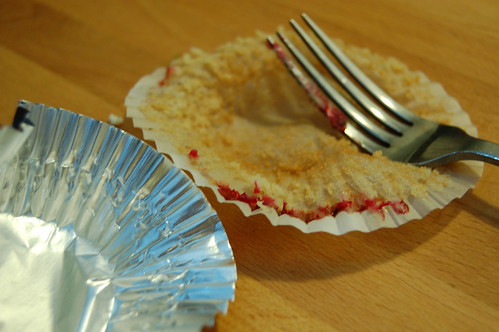
After a brief poll of the twitterverse, I decided on a batch of cakes. Well, cupcakes. Muffins? We ate them for dessert last night but then again for breakfast this morning, so I don't know what to call them. Anyway, I adapted this from Bea's recipe on La Tartine Gourmande, and next time I will almost certainly mix a few berries into the batter instead of just putting them on top, because they were such a nice foil to the sweetness of the cake that I wanted more! more! more!

And about that book giveaway! The random number generator has selected from 17 eligible comment the winner: number 7! Congratulations actionmoviegirl! Shoot me an email with your address (adriennebruno AT gmail DOT com) and I'll get your books in the mail. But wait, there's more!
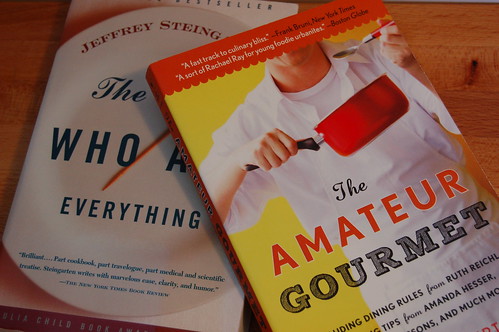
Because I like you guys, and because I have a bookshelf that STILL needs clearing, here are two more books you can win. This time the theme is gourmets. One, the Amateur Gourmet Adam Roberts and the other, a professional gourmet - food critic and frequent Iron Chef America judge Jeffrey Steingarten. Leave a comment on this post by midnight (Boston time) on Tuesday, July 14th and I'll select a winner on Wednesday. To get you started: what weird food item have you bought with no plans on how to use it? And what did you end up doing with it? Now, about those cakes....

Red Currant Cakes
I used a small muffin tin with six regular sized cups in it, but if you only have a full sized muffin pan, fill the empty cups with water so they don't scorch in the oven.

1/2 cup cake flour
1/2 cup almond meal (pulverize some blanched almonds in a food processor if you don't have this on hand)
scant cup of sugar
1/4 tsp baking powder
1/4 tsp salt
two eggs
large handful red currants
2 Tbsp butter, melted and cooled slightly

Preheat your oven to 350. Generously butter six muffin cups or line them with paper cupcake liners

In a medium bowl, combine the cake flour, almond flour, sugar, baking powder and salt. Whisk to combine. (I use a whisk because I'm a cheater and I hate sifting.) Beat the two eggs in a small bowl, then add them to the dry ingredients and stir gently with a wooden spoon. Before the eggs are completely combined, add the melted butter and stir just until it all comes together. If you're adding any currants to the batter, do so when you add the butter, but save some for the tops of the cakes.

Distribute the batter among six muffin cups, and gently press a tablespoon or more of currants on top of the batter. I started baking these for 25 minutes but I lost count of how many times I added five more minutes to the timer because they were still jiggly. I would start checking them at half an hour, but the may take as long as 45 minutes. Bake until the tops are risen and a thin knife inserted in the center just has a crumb or two clinging to it. Serve with ice cream for dessert or jam for breakfast.

Monday, July 6, 2009

Fourth of July + Book Winner + More Books

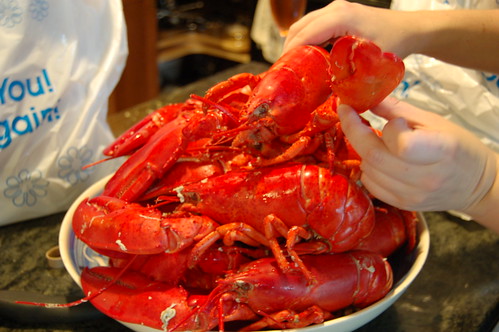
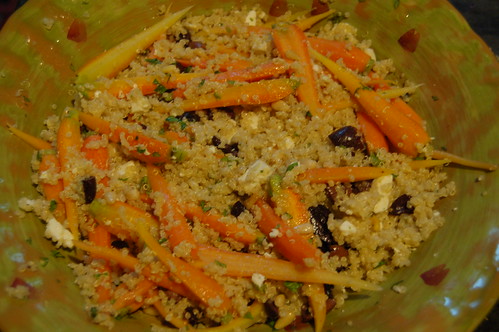
It's always so nice when dinner greets you with a friendly wave, eh? As usual, lobster was on the menu for the Fourth of July feast-ivities. We also ate some baby carrot salad (recipe via 101 cookbooks, I added feta and tossed it with quinoa).

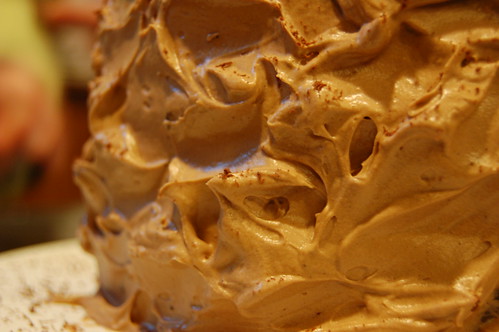
Oh, and I made coffee-chocolate cake.

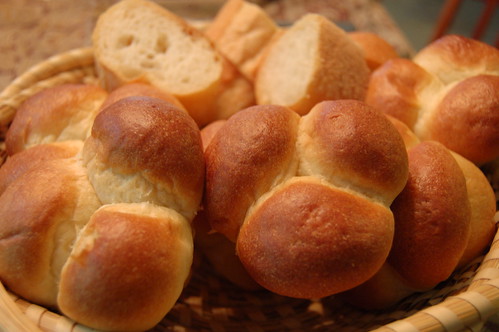
And some sweet and fluffy cloverleaf rolls.

We also tried out the jet skis, got caught in a rain storm, played cribbage, and ran into people playing cribbage. All in all a delightful way to spend the holiday weekend!

But now we're here to find out about the winner of my first book giveaway! I used random.org to generate a random winner because, well, it's 10pm and I'm here by myself. Also, I'm having a pretty bad hair day so I don't think you want to see pictures of me drawing a name out of a hat. I can't figure out how to show you how it works, so you're going to have to trust me: of the 13 eligible comments (I didn't include my own comments, people who commented after midnight, or people who said they didn't want the book), the random number generator spit out the number...... TWO! Congratulations, Aimee, you're the lucky winner of a paperback copy of Julie and Julia! Shoot me an email with your address and I'll get it in the mail.

What's that? You wish YOU had won the book? Well, let's see. How about I sweeten the deal a little bit? We'll go the nonfiction route, but this time it'll be a pair of books:


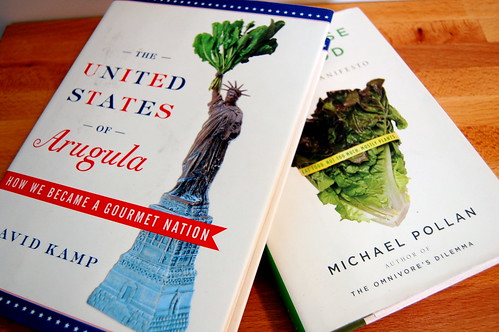
The United States of Arugula, by David Kamp, an essential history of the gourmet revolution in the US, and In Defense of Food by Michael Pollan, which if you haven't heard of by now... well, that's all the more reason for you to read it. I'll pick a winner at random on Friday. Two books for the low, low price of a comment left on this post before midnight (Boston time) on Thursday, July 9th. I want to know: what was the best thing you ate this weekend?

Tuesday, June 30, 2009

Grissini and a Giveaway!


Crunch. Crunch, crunch. Shnomf, munch, crinchety-cronch. Mmm. Pass me another?

These, my friends, are the thin, crunchy, Italian breadsticks known as grissini. A couple of weekends ago Adam and I spent an afternoon making sixty some-odd crunchy breadsticks for a dinner party we were going to that evening. No, I did not notice before we started that the recipe made 16 per portion of dough and therefore 16 x 4 = SIXTY FOUR. Heh.

But you know what? Between the 8 of us, we ate all of them. After a totally delicious meal of insalata caprese, goat cheese and portabello salad, eggplant Parmesan and cherry clafoutis, I looked over at the grissini platter and there were only 3 (!) left.

It stands to reason, then, that you should make these for your next party. I found them via Nick over at Macheesmo, who added a little whole wheat flour to the original recipe, but you don't need to. I used regular old all purpose flour and I was very happy with the results. If you play around with the toppings (cheese? chili powder? fennel seeds?) or flour (rye sticks with caraway seeds?) let us know in the comments, ok?

Oh what was that other thing I mentioned in the title? Riiight: giveaway! I'm moving into a new apartment in a month, and I'm trying to lighten my very heavy load of books. I thought you guys might appreciate some of the food-related novels and such so let's begin the giveaways with this one:

Have you read Julie and Julia yet? The movie's coming out at the beginning of August, so you better hop to it! If you'd like this copy, leave a comment on this post any time before midnight on Sunday, July 6. I'll pick a winner at random on Monday. Oh, and if you just cannot wait another minute to find out what other books I'll be giving away, you could sneak over to my Flickr photos. [Update: winner has been selected! Check it out here.]


Grissini
adapted from Wild Yeast and Macheesmo
makes 64 breadsticks

623 g flour (about 5 1/2 cups)
397 g water at room temperature (scant two cups)
6.5 g (2 t.) instant yeast
9 g (1.5 t.) salt
28 g (2 T.) olive oil
kosher salt and coarsely ground black pepper

Combine the yeast, salt, and flour in a large bowl. Combine the water and olive oil in a small bowl or liquid measuring cup. Add the wet ingredients to the dry ingredients and stir with a wooden spoon to combine. Eventually you will need to use your hands, and once a shaggy dough has formed, turn it out onto a floured surface and knead until smooth and elastic, 5-10 minutes. I added probably another 1/4 cup of flour total as I was kneading to keep my dough from sticking to the board.

Lightly oil the mixing bowl (no real need to wash it at this point) and place the dough in the lightly oiled bowl. Cover loosely with plastic wrap and allow to rise at room temperature until doubled in volume, 1.5-2 hours.

Once the dough has doubled, preheat the oven o 350F. Line a baking sheet (or two if you have them) with parchment. Divide the dough into four equal pieces. Start with one piece and keep the others covered. Flour a work surface and roll the dough into an approximately 12x8 inch rectangle (no need to bust out the ruler here!). Using a pizza cutter, slice the dough rectangle into 16 equal strips. Fold each strip in half the long way (they go from 8 inches long to four inches long) and roll them out into long snakes on an UNFLOURED surface. It has to be unfloured, they need a little stickiness in order to come together and stretch out. Each snake should be a little longer than your baking sheet.

Distribute the snakes evenly across your baking sheets. Lightly brush them with olive oil and sprinkle liberally with salt and pepper. Roll them around a little to catch the salt and pepper around them. Bake at 350 for 25-30 minutes until golden; if you think of it, rotate the sheets once while baking. Cool the grissini on a wire rack - the crunch develops as they cool! Repeat with the other 3 portions of dough as baking sheets become available.

Friday, June 26, 2009

The Custardy Allure

I have never been a sweet breakfast person. If I'm out to brunch, I may try to steal a bite of your banana-walnut pancakes or cheese and strawberry blintzes, but I only ever want a bite, and I will quickly return to my huevos rancheros or everything bagel and smoked salmon.

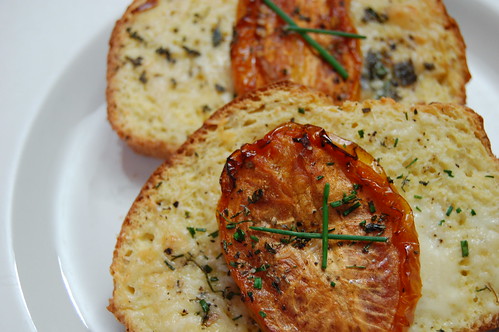
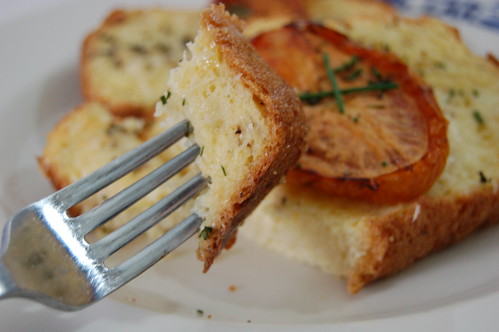
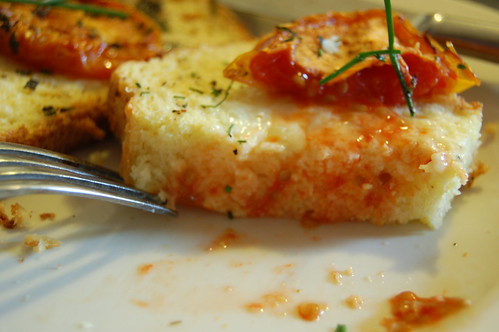
The custardy allure of french toast is not totally lost on me, though, so when Adam suggested we bridge the great sweet/savory divide last weekend and add some Gruyere and fresh herbs to french toast, I said Yes! Now let's make a brioche. (Clearly, you can buy a brioche or use sandwich bread, but don't you own ABin5 yet? So. Easy.)


Adapted from a very schmancy breakfast sandwich recipe found on cookthink, this recipe used the very end (!) of last summer's slow roasted tomatoes that I had hidden away in the back of the freezer. If you're already through your stash, I suggest you 1. bookmark this recipe and make it in September and 2. try it with a different vegetable! Asparagus would be lovely, blanched first and arranged on top of the toast. I bet sauteed spinach would be good, or even broccoli, as long as you cut the florets small enough and tossed the blanched pieces with a light touch of olive oil. Heck, you could even skip the veggie topper altogether.

Savory French Toast with Slow-Roasted Tomatoes
Serves 2

4 thick slices brioche, ciabatta, or other bread
1/2 cup half-&-half, cream, or whole milk
1 egg
salt and pepper
2-3 teaspoons Dijon mustard
1 1/2 tablespoons fresh herbs such as sage, marjoram, thyme, chives (we used thyme and marjoram, and garnished with chives)
3 ounces Gruyere or other swiss cheese, grated
4 halves of slow-roasted plum tomato (one total tomato per person) or the veg of your choice, blanched

Preheat the oven to 400F. In a wide, shallow dish, whisk together the cream, egg, and salt and pepper (start with a half teaspoon salt and 1/4 teaspoon pepper). Dip the bread slices into the egg mixture, turning to coat, and leave them to soak for about 20 minutes. Defrost the frozen tomato halves, if necessary.

Line a baking dish or cookie sheet (with sides) with parchment paper and butter it well so the toast doesn't stick (and believe me, it wants to stick). Place the bread slices on the paper, and spread each with a thin layer of mustard. Sprinkle with herbs and cheese, divided evenly among the four slices, and top each with a tomato half, face up. If you like, you could sprinkle more cheese and herbs on the tomato.

Place the baking dish in the oven for 20 minutes or so, until the bread is slightly browned on the inside and the tomatoes are taking on a little color. Garnish with chopped chives or other herbs.

Wednesday, May 20, 2009

Hurry Up and Wait, or, Homemade Vanilla Extract

Inspired by Clotilde at Chocolate and Zucchini and Katie at Salt and Chocolate, I started my own batch of vanilla extract on Sunday! I took the simplest possible route: 3 vanilla beans, split open and halved, tucked in a carefully cleaned jar and covered with about a cup and a quarter of vodka. Shake once a week or so, and store in a dark cupboard. Alas, it'll be about two months before I can use it, but I'm excited for July!

If you're interested in trying DIY vanilla extract, and you're in the Boston area, might I suggest Christina's spice shop in Inman Square, Cambridge? I got five beans for $10. I'm sure they're not the the finest beans money can buy, but they're plump enough for me.

Sunday, May 10, 2009

Brown Butter Raspberry Tart

Do you have a dessert good enough for strangers in your repertoire? Um, now you do. Holy crap, dudes. That was my reaction after bite one: when is the next time I'm going to be cooking for people, because I want to make THIS for dessert.

Start with a pretty straightforward crust of butter, flour and sugar. I had to add a little extra butter and flour to stretch the recipe - my tart pan is 10 inches, not the 9 inch called for by the recipe.

Stand up the raspberries shoulder to shoulder.

Twelve ounces of berries filled my tart pan fine, but next time I may go with a mix of raspberries and black berries.

Whisk together a couple of eggs and some sugar, and brown a stick of butter. Browning the butter separates the milk solids from the fat, and then the solids hang out on the bottom of the pan getting all toasty and nutty brown. Whisk the whole thing together, then pour it evenly over the berries until they juuust peek out the top.

This is hard part #1: do your best not to lick the oven door while it bakes, because WHOA does it smell good. Look, the raspberries turned into jam! JAM!

While you're letting it cool to room temperature (TORTURE, or hard part #2), make dinner. It doesn't even matter what it is, because this tart will be distracting everyone from over there on the counter.


Brown Butter Raspberry Tart
Adapted from Bon Appetit, June 2009

I've adapted the crust to fill a 10-inch removable bottom tart pan. Click the link above if you want the 9-inch pan measurements.

CRUST
8 Tablespoons (1 stick) unsalted butter, melted
1/2 cup plus 1 tablespoon sugar
1/4 teaspoon vanilla extract
1 1/4 cups flour
pinch of salt

Preheat the oven to 375 with a rack in the center. Using a fork, mix together the melted butter, sugar and vanilla. Add the flour and salt and stir. As the butter cools, the mixture will get more and more crumbly. Using your fingertips, press small pieces of dough into the sides of the pan. Spread crumbles of dough in the center of the tart pan, then use your fingers to fuse the pieces together and press it into an even layer. Bake for 18 minutes, until the crust is slightly puffed and light golden brown. Set the crust aside to cool while you work on the filling. Maintain the oven temperature.

FILLING
1/2 cup sugar
2 large eggs
pinch of salt
1/4 cup all purpose flour
1 teaspoon vanilla extract
1/2 cup (1 stick) unsalted butter, cut into small pieces
2 6-ounce containers fresh raspberries

Whisk the eggs, sugar, and pinch of salt in a medium bowl until smooth, then add the flour and vanilla and whisk until smooth again. Set aside.

Have a glass measuring cup ready. In a small sauce pan with a light colored bottom, melt the butter, stirring with a wooden spoon. It will foam, and then the foam will subside. You will be able to see the milk solids on the bottom of the pan, keep stirring so they don't stick. The solids will start to turn brown, but watch them carefully! They'll go from deep nutty brown, which you want, to burnt (no thank you) in a matter of moments. When the butter has browned, immediately transfer it to the glass measuring cup. Slowly whisk the browned butter into the egg mixture, do this a little at a time so the eggs don't scramble.

Stand the raspberries up in the cooled crust, pointy side up, in concentric circles. Carefully and evenly pour the egg and butter mixture over the berries. Bake the tart until the filling is puffed and golden and a tester inserted into the center comes out clean, 40-45 minutes. Mine was ready at 43 minutes. Cool the tart completely in the pan on the rack. When the tart is cool, remove the sides of the pan, cut the tart into wedges and serve. Buttermilk ice cream makes an excellent accompaniment.

Serves 8-10, depending how generous your slices are.

Wednesday, April 29, 2009

In which I am adopted, and make cupcakes.

First, Mom, don't worry! I'm only talking about Adopt-A-Blogger! When I saw on Dine and Dish that Kristen had decided to host the event a third time, I was excited. I had heard about during round two, and doesn't it seem like such a good idea? Baby food bloggers (about a year old or younger - yes, I know I just turned 1, but I have a lot to learn) are "adopted" by more seasoned bloggers for 3 months. I'm lucky to have been adopted by Cheri at Adventures in the Kitchen... Hi Cheri! I'm adding Cheri to my blogroll over there on the right, and you should go check her out. And then you should make popovers, and send them my way. Yum.

On to another delicious pastry item baked in a small container: about those cupcakes. I think they're cheerful looking, but frankly they weren't the best cupcakes I've ever had. Mostly I wanted to make them because I had candied some kumquats and I was expecting visitors... but then that turned into an impromptu trip to Brooklyn and I left the cupcakes in the fridge. This recipe is from the February 2006 issue of Bon Appetit, and the Epicurious reviewers must have been joking when they describe it's "light crumb." I had eaten one before I left, and it was tasty, but not airy and light. I think I folded in my egg whites a little too vigorously. On my return to Boston three days later, they had gotten sort of heavy and more fudge-like, but the flavor is still good, if you like white chocolate.
White Chocolate Cupcakes with Candied Kumquats
adapted from Bon Appetit, February 2006

8 ounces high-quality white chocolate (I used Ghirardelli) chopped
1 3/4 cups all purpose flour
1 teaspoon baking powder
1/2 teaspoon coarse kosher salt
1 cup sugar
3/4 cup (1 1/2 sticks) unsalted butter, room temperature
1 tablespoon vanilla extract
1/2 cup canned unsweetened coconut milk
3 large egg whites
Preheat oven to 325°F. Line a twelve cup muffin pan with paper liners, or not if you use a silicone pan like me. Place white chocolate in metal bowl set over pan of barely simmering water. Stir until melted and smooth.

Whisk flour, baking powder, and salt in medium bowl. Using electric mixer, beat sugar, butter, and vanilla in large bowl until blended. Add warm white chocolate to sugar mixture; stir to combine. Add flour mixture in 3 additions alternately with coconut milk in 2 additions, beating batter just to combine between additions. Batter will be stiff.

Using clean dry beaters, beat egg whites in medium bowl until soft peaks form. Gently fold egg white mixture into batter in 3 additions. The first addition can be stirred quite vigorously, but when folding in the last two additions, be gentle, as you don't want to break the egg white foam.

Divide batter among muffin cups (about 1/4 cup each). Bake until tester inserted into center comes out clean, about 25 minutes. Cool completely before frosting.

White Chocolate Frosting
I left out the white chocolate, and this made a simple cream cheese frosting instead
4 1/2 ounces high-quality white chocolate, chopped
6 ounces (3/4 of 8-ounce package) cream cheese, room temperature
6 tablespoons (3/4 stick) unsalted butter, room temperature
1/4 cup powdered sugar
1/2 teaspoon vanilla extract
1/4 teaspoon coarse kosher salt

Stir white chocolate, if using, in ametal bowl set over saucepan of barely simmering water until melted and smooth. Cool slightly. Using electric mixer, beat cream cheese, butter, sugar, vanilla, and salt in medium bowl until fluffy. Gradually beat in melted white chocolate. Let cool until thickened to spreadable consistency.

Spread frosting over cupcakes. Drain Candied Kumquats (see below); arrange kumquats decoratively atop cupcakes. Leftover candied kumquats can be stirred into your favorite pound cake for delicious results!
Candied Kumquats
Couldn't be simpler! Way less complicated than the orangettes.
20 kumquats, sliced and seeded
1/2 cup water
1/2 cup sugar
Stir water and sugar in small saucepan over medium heat until sugar dissolves. Increase heat and bring to boil. Add kumquats and return to boil. Reduce heat to medium and simmer until fruit is tender and liquid is syrupy, about 20 minutes. Transfer to bowl; cool to room temperature. Keeps for ages in the fridge.

Tuesday, April 14, 2009

Alton Brown's Buttermilk Biscuits


I can't stop baking. Evidence: cilantro cake, bread, chocolate cake, cupcakes, and biscuits, all in the last two weeks. I made the biscuits twice last week, and I think I might do it AGAIN tonight because it is the last day of my buttermilk's life.

I mean, hello? Buttermilk biscuits? Yes, please, with honey. There's no delightful POP when you jab the can with a spoon, and these are significantly less buttery (I call that greasy) than the insta-biscuit, but it really doesn't take THAT much more time. This dough mixes up in about 10 minutes, and they bake for 15. Piece o' cake biscuit.

Adam made a chicken-sausage based gravy to go with these on Saturday morning that was positively freaking scrumptious, but like those mojitos way back last summer, you'll have to ask him for that recipe.

Buttermilk Biscuits
by Alton Brown, makes 10-12 if you use a 2 inch cutter

2 cups flour
4 teaspoons baking powder
1/4 teaspoon baking soda
3/4 teaspoon salt
2 tablespoons butter
2 tablespoons shortening
1 cup buttermilk, chilled

Preheat oven to 450 degrees.

In a large mixing bowl, combine flour, baking powder, baking soda and salt. Using your fingertips, rub butter and shortening into dry ingredients until mixture looks like crumbs. (Alton says: the faster the better, you don't want the fats to melt. I say: use a pastry cutter if you want, and make sure the bowl is cold, too.) Make a well in the center and pour in the chilled buttermilk. Stir just until the dough comes together. The dough will be very sticky.

Turn dough onto floured surface, dust top with flour and gently fold dough over on itself 5 or 6 times. Press into a 1-inch thick round. Cut out biscuits with a 2-inch cutter, being sure to push straight down through the dough. Place biscuits on baking sheet so that they just touch. Reform scrap dough, working it as little as possible and continue cutting. (Biscuits from the second pass won't be as tall, but they'll still be biscuits, so whatever. I actually reworked my scrap scraps twice and got a single, fairly flat biscuit out of the last pass.)

Bake until biscuits are tall and light gold on top, 15 to 20 minutes. Best served hot, but reheat ok in a toaster oven.

Wednesday, April 8, 2009

Savory Cilantro Cake

Earlier this evening I caused a bit of a stir on Twitter. Nothing major, I just mentioned this "cake" and a number of people (including actual professional food writers, WHAT?) were all oh hey that sounds goooood.
Do you ever just all-of-a-sudden remember a recipe? I must have bookmarked this at least a year ago, and I made it once and promptly lost the bookmark. Luckily, I email things to myself! This past weekend I accidentally bought MORE cilantro instead of parsley (oops) and I was looking for a way to use some.

In case you wanted to know what yogurt and olive oil look like on top of a bowl of frothy eggs, now you know. I subbed yogurt for milk because I don't keep milk around, but I'm thinking perhaps I should have used buttermilk instead (oddly, I have that around more often than regular milk).

The way I remember this the first time I made it was lighter and more crumbly; I think it was the yogurt that made this incarnation denser. Freaking delicious, but denser than I remember. The original recipe is here, from Dorie Greenspan: it's a french cake salé, and she uses cheddar and chives.

The incarnation I bookmarked many moons ago was this one, with cilantro, cheddar and goat cheese. I had originally planned to use dill Havarti, but... let's just say it was past it's prime. I ended up using the not-very-French combination of 2.5 oz provolone, .5 oz Parmesan, and 2 oz cream cheese (my kitchen scale has a tare function and I l-o-v-e it). It would be an interesting addition to the Easter Brunch table, n'est-ce pas? Next to the lemony tarts and danishes and all those sweet things?

Savory Cilantro and Cheese Cake
keeps about 2 days at room temp, well wrapped, and makes excellent toast and croutons when it starts to dry out.

1 cup AP flour
3/4 cup whole wheat flour
1 Tbsp baking powder
1/2 to 1 tsp salt, depending on your cheeses. I used 3/4 tsp because Parmesan is pretty salty.
several grinds fresh black pepper
3 large eggs, room temperature
1/3 cup milk or yogurt
1/3 cup olive oil
3 oz cheddar or other medium hard cheese, coarsely grated
2 oz goat cheese or cream cheese, cut into small cubes
1/2 cup chopped cilantro (or other herbs, or a combination)
optional: 1/3 cup chopped walnuts or other nuts

Preheat the oven to 350 F.

Put the flour, baking powder, salt, and pepper in a large mixing bowl and whisk the ingredients together to combine. Put the eggs in another mixing bowl; whisk for about 1 minute, until they’re foamy and blended. Whisk in the milk and olive oil.

Pour the wet ingredients over the dry ingredients and, using a spatula or a wooden spoon, gently mix until the dough comes together. When there is still a little bit of dry ingredient showing, stir in the cheese, grated and cubed, the herbs and the toasted walnuts, if you’re using them, so that everything is moistened. Don't take it too far; like all quickbreads you want to be gentle with this one, lest it get tough on you. You’ll have a thick dough. Turn the dough into a buttered loaf pan and even the top with the back of the spatula or spoon.

Bake for 35 to 45 minutes, or until the bread is golden and a slender knife inserted into the center of the loaf comes out clean. Transfer the pan to a cooling rack for a few minutes, then run a knife around the sides of the pan and turn the loaf over onto the rack; invert and cool to room temperature right-side up.

Thursday, March 19, 2009

The Muffins of My Childhood


I know this isn't the most ringing endorsement I'll ever give a baked good, but: this is a solid muffin. It comes together lightning quick (mixing bowl to table in half an hour!), it tastes good, and it makes the house smell fantastic. It's flavored with nutmeg, though I usually add a bit of cinnamon to the batter as well as to the top of the muffin. Adam and I whipped up a batch to take to a birthday brunch last weekend, and I think that's their best application. They're small, so one is not enough for breakfast (at least not for me, but take that as you will) but they are a good supplement to a larger spread.

These are the muffins my mom used to make before church when I was little, and I thought "donut muffin" was just what we called them, but apparently that's their real name!

Doughnut Muffins
adapted from the Marjorie Standish Cooking DownEast Cookbook

1 large egg
1/3 cup cooking oil (canola or vegetable)
1/2 cup milk or plain yogurt
1 1/2 cup unbleached all purpose flour
2 teaspoons baking powder
1/2 teaspoon salt
1/2 teaspoon nutmeg
1/2 teaspoon cinnamon
1/2 cup sugar
cinnamon, sugar, and butter for the tops of the muffins

Preheat oven to 400 degrees.

Using a fork, beat egg in mixing bowl. Add oil and milk or yogurt. Continue beating with fork. Sift flour, measure and sift with sugar, baking powder, salt and nutmeg. Add to mixture and stir with fork, very lightly. Turn into 12 greased muffin tins. (Next time I'll use 9 instead of 12, they were awfully tiny. Fill the empty cups with water so they don't warp in the oven.) Sprinkle each muffin with a mixture of sugar and cinnamon and put a dot of butter or margarine on top of each. Bake at 400 degrees about 20 minutes. Best served warm.

Wednesday, February 4, 2009

Chipotle and Cheese Souffle Muffins

Have you made those cottage cheese muffins yet? I may mentioned them to you a few months ago and told you to give them a try but did you? Did you? Hmph. Maybe you did. I'm sorry, I don't know what's come over me. Maybe it's that I made this awesome chipotle and green onion version last week and they're gone now... tragically gone! And I'm back to store bought English muffins for breakfast! My life is SO HARD! *sob*


Okay! Enough melodrama. Here is the story: I had an open can of chipotles in adobo in my fridge, and for the life of me I cannot remember what I originally opened them for. I know they went into scrambled eggs and chili and these muffins once they were open but the first use escapes me.


Wait, I remember! I opened them for the same reason I bought the queso fresco that aaaalso went into these muffins. I made a giant white bean and kale chipotle baked thingy. It was great. Next time I make it I'll add more kale. So apparently this is a 101 cookbooks-centric post. Thanks for all the recipes, Heidi!


That said, I've tweaked the recipe a little bit: since I didn't have any almonds around I just used whole wheat flour for the whole thing. Now please forgive the wacky tone of this post, as it is only Wednesday and I was ready for it to be Friday when it was still only Monday. Look at that sentence! See what I mean? I blame the snow, not these muffins.


Chipotle & Cheese Muffins
adapted from 101 cookbooks

1 cup plain cottage cheese (low-fat is fine)
3/4 cup queso fresco, crumbled
1 1/4 whole wheat cup flour
1 teaspoon baking powder
2-3 chipotle peppers in adobo, chopped
3-4 green onions, chopped
1/4 cup water
4 eggs, lightly beaten
1/2 teaspoon salt

Preheat oven to 400F degrees. Line muffin tin with paper cups or grease lightly OR use a silicone muffin pan, like me (I love it).

Put the cottage cheese into a bowl with the queso fresco, the flour, baking powder, chipotles, green onions, water, and eggs, and season with salt, then mix all together.

Spoon the mixture into the muffin cups 3/4 full and bake for 30-35 minutes, or until set, risen, and golden brown. Serve as hot or at room temperature.

My muffin tin has 12 cups so this makes 12 smallish muffins.